Reinforcing old floors and joists doesn’t always require removing the entire floor system, but you shouldn’t begin without a careful inspection. Check for rot, cracks, sagging, undersized members, altered supports, and signs of insect or water damage. Then assess current and future loads, select compliant methods such as sistering, blocking, beams, or posts, and plan secure connections and bearing points. Because squeaks and bounce can indicate deeper problems, your next step is to determine which repairs require professional design and permits.
Key Takeaways
- Inspect joists and floors for sagging, rot, insects, cracks, moisture damage, weak connections, and unauthorized alterations.
- Calculate existing and proposed loads, including occupants, partitions, appliances, finishes, and concentrated loads, using applicable building codes.
- Choose reinforcement—sister joists, steel plates, engineered lumber, beams, posts, blocking, or replacement—based on span, damage, access, and load requirements.
- Ensure new beams and posts have properly designed connections, continuous foundation bearing, approved fasteners, and temporary shoring during installation.
- Obtain required permits and inspections, coordinate utilities and fire-stopping, document concealed work, and never cut joists without an approved design.
Inspect Existing Floors and Joists First
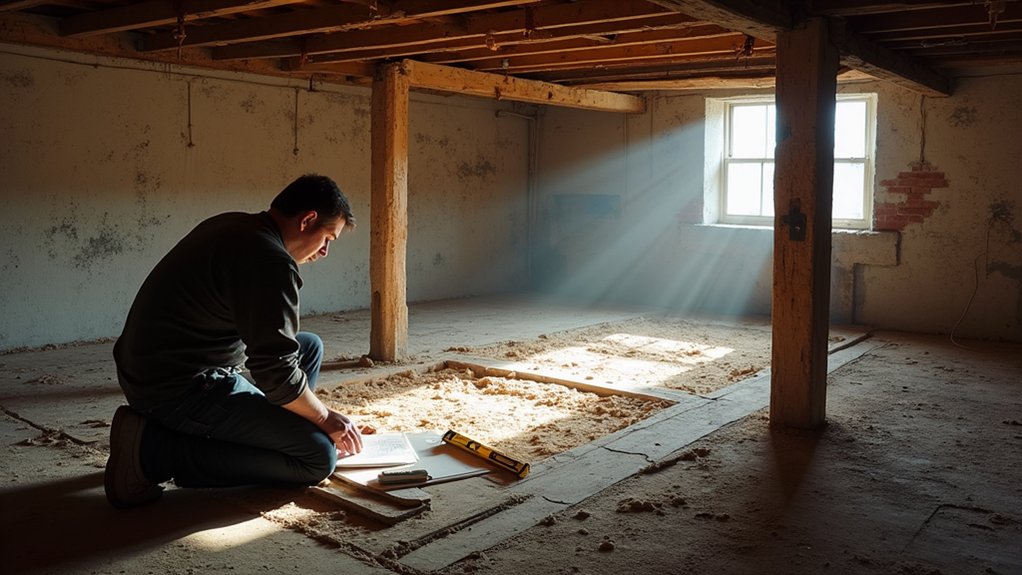
Before reinforcing a floor, inspect the existing joists, beams, subfloor, and supports for sagging, rot, insect damage, cracking, water damage, and unauthorized alterations.
Record dimensions, spans, spacing, connections, bearing points, and access conditions, then photograph every area before removing finishes.
Check whether floor finishing or decorative treatments conceal fasteners, joints, vents, or previous repairs; remove coverings selectively, preserving historic materials when required.
Verify that alterations comply with local building codes, permit requirements, fire-resistance provisions, and heritage restrictions.
Use a qualified structural professional where access is limited, materials are unusual, or documentation is incomplete.
Don’t cut, drill, jack, or add members during inspection.
Compare field measurements with original drawings, if available, and document discrepancies.
Keep inspection records, material observations, and recommendations together for design review and approvals.
Identify Loads, Damage, and Structural Weaknesses
Identify every load the floor must carry, including occupants, partitions, finishes, appliances, stored materials, wet-area fixtures, and temporary construction loads.
Check applicable building-code tables and confirm whether the proposed use changes the required live or dead loads.
Map load distribution, noting bearing walls, beams, posts, openings, and concentrated loads from tubs, safes, or masonry partitions.
Document damage precisely. Look for sagging, excessive vibration, cracked or split joists, crushed ends, rot, insect galleries, fire damage, loose connections, and undersized or altered members.
Probe suspicious timber, measure deflection, and record moisture readings.
For steel or concrete, note corrosion, section loss, spalling, exposed reinforcement, and cracking patterns.
Trace leaks and drainage failures rather than concealing symptoms.
Verify material compatibility among existing members, fasteners, finishes, and any proposed work.
Have a qualified structural professional evaluate uncertain conditions and specify required inspections, permits, and temporary safety controls.
Choose the Right Joist Reinforcement Method
Before choosing a method, you’ll assess each joist’s condition, including decay, cracking, deflection, and connection damage.
You’ll compare options such as sistering, steel plates, engineered lumber, or replacement, considering access, cost, and code requirements.
Match the selected reinforcement to the calculated loads and have a qualified professional verify the design where required.
Assess Joist Condition
Start by inspecting each joist for rot, insect damage, cracking, excessive deflection, water staining, and improperly cut holes or notches. Use a flashlight, probe, level, and moisture meter, then record locations, dimensions, and severity. Don’t conceal damage before documenting it.
- Identify the joist material, such as sawn lumber, engineered wood, or steel; each reacts differently to damage and moisture.
- Check bearing ends, pockets, and connections for crushing, corrosion, settlement, or missing supports.
- Measure spans, spacing, depth, and visible sag, and compare observations with the original plans or a measured survey.
- Investigate leaks, drainage, ventilation, and previous alterations that may explain deterioration.
Have a structural engineer evaluate significant defects, especially in load-bearing areas or historic buildings. Confirm required permits and code provisions before work begins.
Early findings protect your renovation budget and establish accurate repair priorities.
Compare Reinforcement Options
Once you understand the joist’s condition, span, loading, and support points, select a reinforcement method that addresses the actual deficiency rather than adding material indiscriminately.
Sistering with sawn lumber can restore damaged edges and maintain familiar construction, while engineered lumber offers consistent dimensions and greater stiffness.
Steel plates or channels provide high strength where space is limited, but they require careful connection detailing and corrosion protection.
A flitch beam can combine timber and steel, though its bolts, access requirements, and installation sequence demand engineering.
Blocking, strapping, or adding a beam may improve load distribution without enlarging every joist.
Compare Material options for availability, fire performance, moisture exposure, and compatibility with existing framing.
Include Cost considerations for design, temporary shoring, fasteners, labor, finishes, inspections, and permit requirements before selecting your method.
Match Method to Loads
Match the reinforcement method to the load causing the deficiency: sister joists suit localized damage or modest stiffness improvements, engineered lumber handles longer spans or higher design loads, and steel plates, channels, or flitch beams address substantial loads where depth is limited.
Before selecting a detail, you should:
- Identify dead, live, partition, and point loads, then verify span, spacing, bearing, and deflection limits.
- Confirm calculations and connections with a qualified engineer, especially for altered load paths or seismic requirements.
- Check Material durability, moisture, corrosion, fire protection, and compatibility with existing timber.
- Protect Historical preservation goals by limiting removal, documenting concealed work, and matching visible materials.
You shouldn’t rely on a stronger member alone: provide adequate bearing, bolting, fastening, and temporary shoring.
Check local permits and adopted building codes before construction, and coordinate inspections where required.
Strengthen Joists With Sistering and Blocking
You can sister weakened joists with properly sized, securely fastened members to increase load capacity and limit deflection.
Add blocking between joists to reduce twisting and help distribute loads, especially near supports or beneath concentrated loads.
Before work begins, verify span, lumber grade, fastener requirements, and local code provisions with your building department or a qualified professional.
Sister Joists for Strength
Sistering strengthens a floor by fastening a new joist alongside an existing one, allowing the pair to share loads and reduce bending. Sister joists work best when they’re sound, straight, and long enough to support the affected span.
- Inspect for rot, insects, cracks, plumbing conflicts, and deflection before sizing repairs.
- Match the new joist’s depth and grade to the existing framing, unless an engineer specifies otherwise.
- Apply approved construction adhesive, then install code-compliant bolts or structural screws at the engineer’s spacing; stagger fasteners and keep proper edge clearances.
- Extend the sister onto bearing walls or beams where possible, using approved hangers or solid bearing at each end.
Your design must account for load distribution, temporary shoring, fire-stopping, and local building requirements. Obtain permits and an engineer’s assessment when damage, altered spans, or significant loads exceed prescriptive code provisions.
Add Blocking Between Joists
Add solid blocking between joists to limit twisting, distribute loads, and keep sistered members aligned. Measure each bay, then cut full-depth lumber or approved engineered blocking for a snug fit. Stagger blocking rows when access allows, and fasten every connection with code-approved nails or structural screws; don’t rely on construction adhesive alone.
Install blocking beneath bearing points, concentrated loads, and joist ends where required by your local code or an engineer’s repair design. Check for plumbing, wiring, and ventilation before cutting, and maintain required clearances around services.
You can add mineral wool between blocks as one of several soundproofing techniques, but don’t obstruct ventilation or fire-separation assemblies.
Finally, plan aesthetic concealment: close openings with properly supported subfloor patches, preserve access panels, and document concealed work for inspections.
Reinforce Floors With Beams and Posts
When existing joists can’t carry the renovated floor loads alone, a properly sized beam and posts can shorten their span and reduce deflection. Before work begins, hire a structural engineer to verify loads, spans, connections, and foundation capacity.
- Size the beam: Account for joist reactions, partitions, finishes, occupancy, and any concentrated loads; don’t guess from similar timber framing.
- Plan load distribution: Position posts beneath beam reactions, align them with supports below, and provide continuous bearing to competent soil or an engineered footing.
- Detail connections: Use approved hangers, bolts, plates, or bearing details, installed to the manufacturer’s requirements. Temporary shoring must remain until the beam carries its design load.
- Check regulations: Obtain permits, follow local codes, protect steel or timber from moisture and fire, and document inspections.
Coordinate plumbing, ductwork, and electrical routes before closing ceilings. Never cut joists or remove supports without an approved design.
Fix Squeaks, Sagging, and Bouncy Floors
Diagnose the source before repairing squeaks, sagging, or bounce: inspect joists, subfloor panels, fasteners, supports, moisture damage, and bearing points. Have a structural engineer assess persistent deflection or altered load paths.
For squeaks, drive properly sized structural screws through the subfloor into joists, avoiding plumbing and electrical services. Where access allows, add construction adhesive and blocking between joists, following the adhesive manufacturer’s requirements.
Replace damaged panels with code-compliant, moisture-resistant material, stagger joints, and fasten them to the framing at specified spacing.
Reduce sagging by sistering joists or installing approved blocking, but don’t notch or drill beyond code limits.
Address floor vibration by correcting loose connections and excessive spans; don’t rely on thicker finish flooring alone.
Confirm repairs won’t obstruct utilities, compromise fire separations, or exceed support capacity.
These measures also improve noise reduction.
Know When to Hire a Structural Engineer
Hire a structural engineer before reinforcing joists if you see significant sagging, cracked or undersized framing, damaged bearing points, long or altered spans, or signs that a load-bearing wall has been removed or moved. You’ll also need professional guidance when renovations add heavy tile, masonry, equipment, or new partitions.
- Check foundation stability: Settlement, moisture damage, or shifting supports can undermine any joist repair.
- Verify load paths: An engineer can trace loads through beams, posts, walls, and footings before you modify framing.
- Confirm building codes: Local requirements may govern spans, connections, fire protection, permits, and inspection documentation.
- Request stamped plans: Drawings and calculations help contractors build safely and help officials approve the work.
Don’t rely on appearance alone. A structural engineer can specify sistered joists, beams, posts, or footing repairs that match actual loads and site conditions.
Frequently Asked Questions
What Permits Are Required Before Reinforcing Floors in an Older Building?
You’ll typically need a building permit before reinforcing floors, and possibly structural, electrical, or plumbing permits. Check local Building codes and contact your building department to confirm requirements, inspections, drawings, and the permit process.
How Much Does Floor and Joist Reinforcement Typically Cost?
You’ll typically spend $5,000–$25,000, depending on damage, access, labor, engineering, and permits. Cost estimation should compare Material options, including sistered lumber, steel beams, or engineered joists. Obtain licensed assessments and local approval before construction begins.
Can Reinforcement Preserve the Building’s Historic Character and Original Materials?
You can preserve historic character: roughly 80% of heritage value often rests in original fabric. Prioritize historic integrity, verify material compatibility, document interventions, and secure approvals before strengthening joists with reversible techniques whenever feasible.
How Long Does a Typical Floor Reinforcement Project Take?
You’ll typically need two to eight weeks, depending on scope, access, permits, and inspections. Allow extra time for Structural assessment, Foundation strengthening, concealed damage, engineering revisions, material availability, and required regulatory approvals.
What Safety Precautions Should Occupants Follow During Floor Reinforcement Work?
You should follow posted evacuation routes, avoid work zones, and obey contractors’ instructions. Wear Personal protective equipment when authorized, report hazards immediately, and don’t re-enter until officials confirm structural stability and safe conditions.
Conclusion
You’ll protect an older building’s future by inspecting joists, confirming loads, and documenting every repair before work begins. Choose reinforcement that suits the damage, secure sistered members, blocking, beams, and posts properly, and follow local codes and permit requirements. Address squeaks, sagging, and vibration rather than masking them. If conditions remain uncertain, consult a structural engineer—small oversights can create a mountain of trouble. With careful planning and verified connections, you’ll create safer, steadier floors built to last.