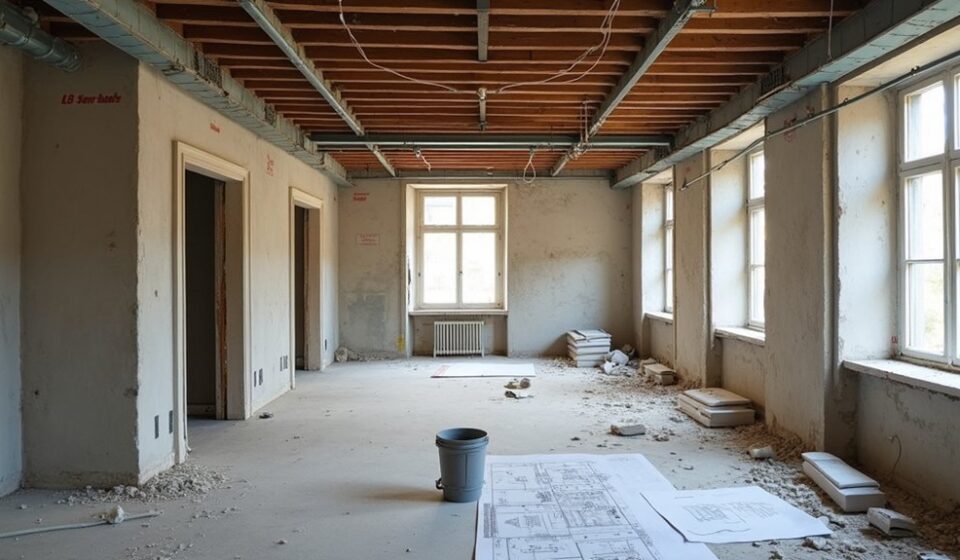

Nearly 30% of renovation delays stem from poor planning and unexpected site conditions. You can avoid many of these problems by treating the strip-out as a structured project, not simply a demolition task. Define what must go, inspect for hazards, protect retained items, isolate utilities, and plan waste removal before work begins. A room-by-room sequence will also expose hidden dependencies—but several critical checks should come first.
Key Takeaways
- Define the strip-out scope, room-by-room sequence, handover standards, budget, and renovation dependencies before work begins.
- Inspect structural conditions and arrange asbestos, lead, utility, and other hazardous-material surveys before removing anything.
- Obtain required permits and engineering approvals, then isolate electricity, gas, water, and other services through qualified professionals.
- Plan labour, tools, PPE, access protection, reusable-item storage, and controlled top-down removal techniques for each work stage.
- Arrange segregated waste containers, licensed disposal, recycling, collection schedules, and final inspections to confirm safe, clean handover.
Define the Strip-Out Scope and Renovation Goals

Before any demolition begins, define exactly what the strip-out must achieve and how it supports the renovation plan. List every item you’ll remove, including fixtures, finishes, cabinetry, flooring, partitions, and services affected by the work.
Mark anything you’ll retain, protect, or reuse, and state the required handover condition for each room. Align the scope with your drawings, structural plans, access requirements, and construction sequence so the strip-out doesn’t undermine later trades.
Establish measurable goals, such as exposing substrates, clearing routes, or preparing specified areas for installation. Include Budget considerations from the start: separate disposal, labor, equipment, protection, and contingency costs.
Use this defined scope to guide contractor selection, compare like-for-like quotations, assign responsibilities, and prevent costly assumptions, variations, and delays during the renovation.
Inspect the Property for Hazards and Restrictions
Before work begins, you’ll need to identify structural hazards that could endanger workers or affect the strip-out sequence.
Arrange professional testing for asbestos and lead, especially in older buildings, and follow all required safety procedures.
You’ll also need to review planning restrictions, listed-building requirements, permits, and local regulations before removing any materials.
Identify Structural Hazards
A thorough structural inspection should guide your strip-out plan, because removing walls, ceilings, floors, or services can expose serious hazards and breach property restrictions.
Begin with a qualified surveyor’s review of movement, cracking, damp-related deterioration, sagging floors, and foundation stability. Request a load bearing assessment before taking out partitions, chimney breasts, suspended ceilings, or stair components; some apparently minor elements may support upper floors or roofs.
Check whether previous alterations weakened joists, beams, lintels, or connections, and confirm temporary works requirements before demolition starts.
Inspect roof structures, retaining walls, basements, and adjacent properties for instability or shared structural elements.
Record defects with photographs and drawings, then obtain engineering specifications, permissions, and method statements.
Don’t let contractors remove structural materials until the responsible professional approves the sequence and supports.
Check Asbestos And Lead
Once structural risks are documented, arrange a refurbishment and demolition asbestos survey before disturbing ceilings, insulation, floor tiles, textured coatings, pipe lagging, or board materials. Use a competent surveyor, and don’t rely on a previous report unless it covers the exact areas and planned work.
An asbestos inspection should identify suspect materials, assess their condition, and provide laboratory confirmation where necessary. Stop work immediately if you uncover unexpected fibres, debris, or concealed lagging; isolate the area and obtain specialist advice.
Arrange lead testing for old paint, window frames, plumbing, and dusty surfaces, particularly in pre-1970 properties. Keep occupants and workers away from contaminated zones, record results, and specify licensed removal or controlled handling before strip-out begins.
Treat every result as a safety instruction, not merely paperwork.
Review Planning Restrictions
Check planning restrictions before finalising the strip-out scope, because listed-building status, conservation-area controls, Article 4 directions, tree-protection orders, and party-wall obligations can limit what you’re allowed to remove or alter.
Confirm your property’s designation with the local planning authority, then review approved drawings, planning conditions, and enforcement notices.
Don’t assume internal works are exempt: removing historic joinery, fireplaces, ceilings, or structural elements may require consent.
Check Zoning regulations and Building codes for permitted uses, accessibility, fire safety, drainage, and structural requirements that could affect demolition methods.
Ask a party-wall surveyor to assess shared walls, floors, and excavation risks, and notify neighbours where required.
Record every restriction in your scope, programme, and budget. Secure written approvals before contractors begin, and retain copies on site.
Decide What to Keep, Remove, Reuse, or Sell
Before work begins, sort every fixture, fitting, finish, and loose item into four clear categories: keep, remove, reuse, or sell.
Keep items that suit the planned design, meet current standards, or would cost more to replace.
Remove damaged, unsafe, obsolete, or unwanted materials, and identify anything requiring licensed disposal.
Reuse sound flooring, doors, sanitaryware, cabinetry, lighting, or hardware where they support your new scheme.
Consider whether reclaimed items could strengthen your furniture arrangement or complement your interior decor.
Sell valuable surplus early, using accurate descriptions and photographs, and set aside proceeds for renovation costs.
Label each decision clearly, record quantities and dimensions, and protect retained items from dust and damage.
Check ownership, warranties, and resale restrictions before advertising anything, especially appliances or recently installed equipment.
Create a Room-by-Room Strip-Out Schedule
Create a room-by-room schedule that prioritises areas strategically, starting with spaces that affect access, safety, or later trades.
Assign each task a clear owner and deadline.
Build in time for unexpected delays.
Coordinate waste removal with the schedule so materials leave the property promptly without obstructing ongoing work.
Prioritise Rooms Strategically
A room-by-room strip-out schedule keeps the renovation organised, reduces delays, and prevents cleared areas from becoming storage zones. Prioritise rooms according to access, structural risk, and how heavily your renovation depends on them. Start with spaces that reveal hidden defects or affect other areas, then protect rooms you’ll need for safe movement, storage, or essential services.
- Inspect first: Check ceilings, walls, floors, plumbing, and electrics before removing finishes.
- Begin with dependencies: Strip kitchens, bathrooms, or service areas before adjoining rooms when shared systems require access.
- Protect priorities: Keep entry routes, temporary facilities, and secure storage usable until necessary.
- Record decisions: Note each room’s contents, disposal needs, salvageable items, and required protection.
Review the Furniture layout and Lighting design before stripping, so you don’t remove features you plan to retain or overlook access requirements. Reassess the order after every inspection.
Assign Tasks And Timelines
Once you’ve set the order, assign each room a clear strip-out lead, task list, and completion date. Break every list into measurable steps, such as disconnecting services, removing fixtures, lifting finishes, and checking the exposed structure.
Set dependencies so one task doesn’t begin before another finishes, and add realistic time for access restrictions, inspections, and unexpected discoveries. Give each person responsibility for reporting progress, protecting retained items, and escalating problems immediately.
Use a shared schedule with daily updates, milestone dates, and a visible record of completed work. During budget planning, link labour hours, equipment needs, and contingencies to each room rather than estimating the property as one block.
Confirm contractor selection before assigning specialist tasks, then require written start dates, deliverables, and sign-off criteria. Review the programme weekly and adjust it without losing overall control.
Coordinate Waste Removal
As you schedule each room’s strip-out, coordinate waste removal before work begins so debris doesn’t block access, delay trades, or create safety risks. Match collection dates to your room-by-room plan, allowing extra time for heavy materials, restricted access, or unexpected volume.
- Estimate waste: Record likely quantities of timber, plasterboard, metal, fixtures, and hazardous materials for each room.
- Choose containers: Arrange appropriately sized skips, bags, or licensed collections, confirming placement permissions and loading limits.
- Separate materials: Identify recycling options for metals, clean wood, masonry, and reusable fixtures; keep hazardous waste isolated and documented.
- Confirm responsibilities: Set contractor coordination rules for loading, collection times, documentation, and site cleanliness, then share them with every trade.
Review the schedule daily. If a room finishes early or produces more waste than expected, reschedule collections promptly and keep walkways, entrances, and emergency routes clear.
Arrange Tools, Labour, and Protective Equipment
Before the strip-out begins, prepare the tools, labour, and protective equipment needed for each stage of the work. List tasks such as removing fixtures, lifting materials, dismantling partitions, and clearing debris, then assign competent workers with defined responsibilities.
Schedule enough labour for safe handling and avoid rushing or overloading individuals. Labour coordination keeps teams productive and prevents people from working in each other’s way.
Gather suitable hand tools, power tools, ladders, trolleys, dust-control equipment, and labelled storage containers. Inspect every item before use, provide operating instructions, and remove damaged equipment.
Apply tool safety rules, including correct attachments, secure grips, and controlled access to powered equipment.
Issue hard hats, safety glasses, gloves, respiratory protection, hearing protection, and sturdy footwear. Keep spare PPE available and replace contaminated or worn items promptly.
Isolate Utilities Before Starting the Strip-Out
With labour, tools, and PPE ready, make the property safe by isolating every utility before the strip-out starts. Arrange professional utility disconnection where required, and never assume an inactive fixture means a dead service.
- Electricity: Have a qualified electrician isolate circuits at the consumer unit, lock the controls, label them, and verify dead circuits with approved testing equipment.
- Gas: Ask a licensed engineer to shut off, cap, and test the supply. Don’t disturb gas pipework yourself.
- Water: Close the main stopcock, drain relevant lines, and protect against hidden pressure or leaks.
- Heating and services: Isolate boilers, fuel supplies, solar systems, alarms, and communication cables as applicable.
Record each isolation point, retain certificates, and brief everyone before work begins. Use these safety precautions: secure access, display warning notices, prevent reconnection, and keep emergency contacts available. Coordinate with utility providers where services enter the building or remain live nearby.
Remove Fixtures and Materials in the Right Order

Once utilities are isolated and verified, remove fixtures and materials from light, non-structural items to heavier elements, working from the top of the property down. Start with ceiling-mounted lights, smoke detectors, curtain rails, and other decorative fixtures. Label reusable items, protect them from damage, and record their locations so you can reinstall or sell them later.
Next, take out cabinets, appliances, doors, sanitaryware, and built-in fittings. Remove floor coverings before lifting underlying boards, then strip wall finishes and suspended ceilings. Leave structural walls, beams, columns, and load-bearing elements untouched unless your engineer has approved their removal.
Use suitable tools and controlled techniques to prevent damage to surrounding surfaces and avoid unnecessary dust. Keep crews moving room by room, following your written sequence. Coordinate material recycling plans separately after removal, without disrupting the strip-out order or work area safety.
Sort Waste and Book Proper Disposal
As materials come out, separate waste at the source into clearly marked containers for rubble, timber, metal, plasterboard, glass, electrical equipment, and general refuse. Effective waste sorting reduces contamination, lowers disposal costs, and keeps your site safer.
- Check local rules before moving asbestos, chemicals, fridges, batteries, or other controlled waste.
- Weigh likely volumes and choose skips, grab lorries, or sealed containers accordingly.
- Keep reusable fixtures separate so you can donate, sell, or store them without damage.
- Arrange Disposal booking early, confirming collection dates, vehicle access, permits, and documentation.
Use licensed contractors for hazardous and electrical waste, and retain transfer notes, weighbridge tickets, and receipts.
Don’t overfill containers or mix plasterboard with general rubble when your facility prohibits it.
Cover loose loads and secure containers to prevent windblown debris, water contamination, and unauthorised dumping.
Complete Final Checks Before Renovation Begins
Before trades arrive, walk the entire property and confirm that the strip-out is genuinely complete, safe, and ready for construction. Check every room, loft, basement, and external area for remaining fixtures, hidden debris, exposed nails, unstable surfaces, and sharp edges.
Verify that utilities are isolated or clearly marked, temporary lighting works, and access routes remain unobstructed.
Review your Safety protocols with everyone entering the site, including emergency contacts, fire precautions, and required protective equipment.
Confirm that asbestos or other hazardous materials have received appropriate testing and removal documentation.
Match the completed work against your scope and budget planning, then record any omissions before approving further costs.
Photograph each area, secure the property, and obtain final sign-off from your contractor, surveyor, or project manager before demolition or construction begins.
Frequently Asked Questions
How Much Does a Full Property Strip-Out Typically Cost?
A full property strip-out typically costs £5,000–£20,000, depending on size, materials, access, and disposal needs. Your cost considerations should include labour, permits, asbestos surveys, waste removal, and safety precautions, while complex projects may exceed £30,000.
How Long Does a Complete Strip-Out Usually Take?
You’ll typically complete a full property strip-out in three to ten days. Complex buildings may take longer, especially when Historical preservation requirements, hazardous materials, access restrictions, or Environmental impact controls require careful surveys, permits, and specialist removal.
Do I Need Planning Permission for a Property Strip-Out?
You usually don’t need planning permission for an internal strip-out, but you may need Building permits for structural changes, listed buildings, or protected areas. Check locally, and arrange compliant Waste disposal before work begins.
Should I Notify Neighbours Before Starting Disruptive Strip-Out Work?
Yes, notify neighbours early; a stitch in time prevents disputes. Explain your schedule, contact details, and expected disruption. Check noise regulations, protect neighbourhood safety, and coordinate deliveries, working hours, and waste collection responsibly.
Can I Remain Living in the Property During the Strip-Out?
You can remain living there, but only if contractors isolate work zones, maintain safe access, and control dust. Review Living arrangements and Noise management, then relocate temporarily if utilities, asbestos, or structural risks arise.
Conclusion
A well-planned strip-out sets your renovation up for success. Confirm the scope, check hazards, and clarify what stays, goes, or gets reused. Schedule each room, secure skilled labour, and isolate utilities before work begins. Remove materials methodically, manage waste responsibly, and complete a careful final inspection. By prioritising preparation, protection, and precision, you’ll prevent avoidable delays, control costs, and hand over a clean, safe site ready for construction. Good planning makes major renovation markedly smoother.