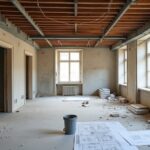
The Essential Steps in Renovating a Disused Building Into Safe, Livable Accommodation

A disused building can look structurally sound while hiding unsafe wiring, unstable foundations, or hazardous materials. Before you plan rooms or finishes, inspect the building, document defects, and check local planning and building-control requirements. You’ll then need to repair the structure, upgrade utilities, improve insulation and ventilation, and install compliant fire-safety measures. Set a realistic budget and retain certificates for every stage, because final approval may depend on details you haven’t yet uncovered.
Key Takeaways
- Conduct comprehensive structural, utility, hazard, heritage, and occupancy assessments, documenting defects and prioritising risks before work begins.
- Secure planning permission, building approval, heritage consents, and other regulatory approvals using detailed existing and proposed drawings.
- Stabilise the building and remove hazards, including asbestos, unstable structures, exposed wiring, dampness, and standing water.
- Upgrade plumbing, electrics, heating, insulation, ventilation, fire compartmentation, alarms, escape routes, and accessibility systems.
- Complete inspections, testing, certification, budget reconciliation, documentation, and maintenance planning before allowing occupancy.
Inspect the Building Before Renovating

Before renovating a disused building, inspect its structure, services, and legal status to identify hazards and approval requirements. Begin with a qualified surveyor’s inspection of foundations, walls, roofs, floors, and signs of settlement, water ingress, rot, or asbestos.
Arrange electrical, gas, drainage, and heating assessments; isolate unsafe systems, and document every defect with photographs and measurements.
Check for fire-compartmentation failures, blocked escape routes, inadequate ventilation, damp, contamination, and pest damage.
Research the property’s Historical significance and record protected Architectural details before disturbing finishes, façades, joinery, or masonry.
Confirm ownership boundaries, occupancy history, easements, restrictions, and existing records with the relevant authority.
Commission specialist testing where evidence is inconclusive, then rank risks, estimate remedial work, and preserve a complete inspection file for your design and construction team.
Secure Planning Permission and Building Approval
Once the inspection identifies structural risks and protected features, confirm which approvals your renovation requires. Contact your local planning authority before finalizing designs, especially if the building is listed, lies in a conservation area, or has historical preservation restrictions.
Submit accurate drawings showing existing and proposed layouts, elevations, access, materials, and external changes. Check whether you need consent for a change of use, extensions, windows, signage, or demolition.
Separately, apply for building approval to demonstrate compliance with requirements for fire safety, ventilation, insulation, drainage, accessibility, and energy performance.
Ask the authority whether permitted development rights apply; don’t assume they do. Coordinate applications with your architect and retain written decisions, conditions, and approved plans.
Address aesthetic design requirements early, because planners may require revisions before granting permission.
Repair the Structure and Remove Hazards
Before work begins, have a qualified professional assess the building’s structural stability and document any defects.
Repair unsafe walls, floors, roofs, and foundations in line with approved plans and applicable regulations.
Remove hazards such as asbestos, unstable materials, exposed wiring, and standing water using licensed specialists where required.
Assess Structural Stability
How can you determine whether a disused building is safe to enter? Start with a qualified structural engineer’s inspection, not a visual tour. Before entry, obtain available drawings, alteration records, fire history, and local authority notices.
The engineer should examine foundations, load-bearing walls, columns, beams, roof structures, floors, stairs, and connections for settlement, distortion, corrosion, rot, cracking, water damage, or unauthorized alterations.
Require a written assessment identifying unsafe areas, imposed-load limits, temporary works, and repair priorities. Follow building regulations, occupational-safety duties, and any permit or conservation requirements.
If the property has heritage value, coordinate structural repairs with Historical preservation objectives; plan aesthetic enhancements only after stability is verified.
Don’t remove finishes that might conceal movement until professionals specify safe investigation methods. Reinspect after repairs and document approvals before occupation.
Remove Safety Hazards
With the structural assessment documented, address immediate hazards before allowing routine access or starting renovation work. Begin hazard identification with unstable walls, loose masonry, damaged roofs, exposed wiring, gas leaks, asbestos, standing water, vermin, and contaminated materials.
Isolate unsafe areas with secure barriers, lockout procedures, and clear Safety signage; don’t rely on warnings where physical exclusion is required. Arrange competent specialists to make temporary supports, disconnect utilities, remove hazardous substances, and weatherproof openings.
Follow local building, fire, electrical, occupational-safety, and hazardous-material regulations, including licensed removal and disposal requirements. Keep residents, visitors, and untrained workers away until you’ve verified controls.
Record photographs, test results, permits, repairs, and sign-offs in the project file. Reinspect after each intervention, and update the risk assessment before work progresses or access conditions change.
Upgrade Plumbing, Wiring, and Heating
Plan the plumbing, wiring, and heating upgrades as one coordinated system, not as separate jobs. Have qualified professionals survey existing pipes, cables, boilers, and service capacity before you design replacements. Check local building regulations, electrical standards, gas rules, and water-authority requirements; obtain approvals and certificates at each required stage.
Replace corroded pipework, fit accessible isolation valves, and protect against leaks with suitable pressure testing.
Rewire unsafe circuits, install modern consumer units, provide earthing and bonding, and position sockets safely for each room’s use.
Choose an efficient heating system sized by heat-loss calculations, with reliable controls and zoning. Smart technology, such as leak sensors and programmable thermostats, can improve monitoring and reduce costs.
Specify eco-friendly materials where they meet safety, durability, and certification requirements.
Record routes, test results, warranties, and maintenance instructions for future occupants.
Improve Insulation, Ventilation, and Fire Safety
You’ll need to upgrade thermal insulation to meet current energy-efficiency requirements and control moisture at walls, roofs, and floors.
Improve ventilation with properly sized, accessible systems that provide adequate fresh air without undermining airtightness.
Protect occupants by installing compliant fire-resistant materials, detection, alarms, escape routes, and compartmentation, subject to local code approval.
Upgrade Thermal Insulation
How can you improve comfort without creating moisture, ventilation, or fire-safety risks? Begin with a condition survey: identify damp, defective roofs, contaminated materials, and cold surfaces before specifying insulation. Check your jurisdiction’s energy code, permitted buildup, and required U-values, then obtain approval where structural or historic constraints apply.
Choose compatible, durable products, including eco-friendly materials such as wood fibre, cellulose, or recycled mineral wool, while confirming moisture performance and fire classification. Install insulation continuously around walls, roofs, floors, reveals, and junctions; otherwise, thermal bridging can cause heat loss, condensation, and mould.
Detail airtight layers carefully, seal service penetrations, and preserve drying potential. Don’t cover wet masonry or conceal defects. Have a competent professional verify thickness, fixings, vapour control, and continuity before closing walls, and retain product certificates for compliance records.
Improve Ventilation And Fire Protection
Once insulation and airtightness improve, upgrade ventilation and fire protection so the building remains healthy and safe. Install a correctly sized mechanical or natural ventilation system, following local building regulations and manufacturer instructions. Provide continuous extraction in kitchens, bathrooms, and utility rooms, with controlled air inlets to prevent condensation, mould, and poor air quality. Test airflow after installation and document compliance for inspection.
Plan fire protection before occupants move in. Fit interconnected smoke alarms on every storey, inside sleeping areas, and along escape routes. Use carbon-monoxide alarms near combustion appliances. Position fire doors, protected escape routes, emergency lighting, and extinguishers according to the approved fire strategy.
Seal service penetrations with certified fire-stopping materials, and don’t compromise compartment walls during later work. Give residents clear evacuation instructions, maintain unobstructed exits, and schedule regular alarm and ventilation checks.
Set a Budget and Complete Final Inspections
Before the final inspection, reconcile the renovation budget against every invoice, allowance, change order, permit fee, and remaining contingency so you can identify unpaid work or cost overruns. Review Financing options early, and document how contractor selection affected price, scope, insurance, and warranties.
- Request certificates, receipts, lien waivers, as-built drawings, appliance manuals, and inspection records. Confirm approved changes match the permitted plans.
- Walk through each room with your contractor. Test alarms, emergency lighting, ventilation, heating, plumbing, electrics, windows, doors, guards, and accessibility features; record defects and deadlines.
- Book the authority’s final inspections, including building, fire, electrical, gas, and occupancy approvals. Don’t house anyone until officials issue required certificates.
Keep a signed completion statement, photographs, warranties, and permit closeout documents. Hold final payment until corrections pass inspection, then update your insurance and maintenance schedule. Never conceal defects or occupy prematurely.
Frequently Asked Questions
How Long Does Converting a Disused Building Into Accommodation Usually Take?
You’ll typically need six to eighteen months, depending on planning approvals, Historical preservation requirements, Structural integrity repairs, building surveys, utilities, and inspections. Complex heritage projects or major defects can extend your schedule considerably.
Can I Live On-Site During the Renovation?
You can live on-site only if your Construction permits allow occupancy and you meet Safety regulations. Confirm approval with your building authority, establish a separated, secure living area, and maintain utilities, sanitation, and emergency access.
What Insurance Coverage Is Needed During the Renovation Project?
You’ll need insurance requirements covering public liability, builders’ risk, property damage, and worker injuries. Compare coverage options with your broker, disclose vacancy and construction, insure temporary accommodation, and verify contractors’ policies before work begins onsite.
How Can I Preserve the Building’s Original Architectural Features?
You can preserve original features through Historical preservation surveys, heritage approvals, and careful documentation. Prioritize Material restoration, retain salvageable fabric, match traditional techniques, and obtain consent before altering façades, windows, masonry, timber, or ornamentation.
Should I Hire an Architect, Contractor, or Specialist Renovation Company?
Hire an architect first; don’t let your project become a regulatory circus. Then appoint a qualified contractor or specialist renovation company. Coordinate Interior design and Budget planning, verify insurance, references, permits, and conservation experience before signing.
Conclusion
By following each stage, you’ll turn a neglected building into compliant, dependable accommodation. Don’t skip the initial survey, permissions, structural repairs, or certified upgrades; shortcuts can create serious safety and legal problems. Keep records of approvals, test results, warranties, and contractor sign-offs. Before you move anyone in, arrange final inspections and resolve every defect. Remember, “an ounce of prevention is worth a pound of cure.” Schedule regular maintenance so the building remains safe, efficient, and lawful.