Coincidentally, the damp patch you noticed during a routine inspection may point to a much larger problem. Before you redecorate, you’ll need to find and fix the moisture source, check structural safety, remove contaminated materials, and dry the property properly. Use damp-resistant repairs and seal vulnerable areas to prevent recurrence. This UK-focused checklist sets out the essential steps, but one overlooked warning sign could undermine the entire renovation.
Key Takeaways
- Identify and repair all moisture sources, including leaks, blocked drainage, failed seals, and ground-level defects, before renovating.
- Inspect structural elements for cracking, movement, rot, corrosion, or instability, isolating unsafe areas and consulting qualified professionals.
- Remove mould and saturated porous materials safely using protective equipment, containment, lawful disposal, and thorough moisture-source correction.
- Dry the property completely with ventilation, dehumidifiers, and air movers, confirming stable moisture readings before redecorating.
- Choose breathable, moisture-resistant materials, maintain ventilation, avoid damp-proof-course bridging, and document inspections and repairs.
Find and Fix the Moisture Source

Before you begin repairs, identify exactly where the water is coming from and stop it at the source. Check gutters, downpipes, roof coverings, flashing, plumbing joints and external ground levels. Look for blocked drainage, leaking appliances and failed seals around baths or windows. Don’t rely on surface drying or repainting; fix the defect first, then monitor the area during wet weather.
Improve airflow in kitchens, bathrooms and enclosed rooms with effective Ventilation strategies. Use extractor fans that discharge outdoors, keep trickle vents open and avoid drying laundry against cold walls.
Where rising or penetrating damp is confirmed, appoint a qualified UK contractor to specify suitable moisture barriers, such as a remedial damp-proof course or tanking system. Never bridge an existing damp-proof course with soil, render or paving. Record the cause, repair and follow-up readings before continuing renovation work.
Inspect Structural Damage and Safety Risks
Once the moisture source has been controlled, inspect the building for damage that could affect its stability or make renovation unsafe. Don’t rely on appearance alone; damp can weaken hidden timbers, masonry and concrete. Arrange a survey by a structural engineer, especially after flooding, subsidence or prolonged leakage.
- Check walls, floors, ceilings and roof structures for cracking, bulging, sagging, distortion or movement.
- Examine joists, rafters, wall plates and lintels for softness, corrosion, rot or failed connections.
- Assess Foundation stability, including settlement, heave, undermining and changes around drains or excavations.
- Isolate unsafe areas, support vulnerable elements and plan Structural reinforcement before removing finishes or load-bearing components.
Use competent contractors and follow the engineer’s repair specification. In England and Wales, check whether building regulations approval or listed-building consent applies.
Never enter visibly unstable areas; contact emergency services if collapse appears imminent.
Remove Mould and Contaminated Materials
With the structure assessed and unsafe areas secured, remove mould and water-contaminated materials using appropriate protective equipment and containment.
Wear disposable coveralls, gloves, eye protection and a suitable respirator, such as an FFP3 mask, especially when disturbing extensive growth.
Seal off affected rooms, protect clean areas and ventilate safely without spreading spores through the property.
Don’t dry-brush mould or use domestic vacuum cleaners; damp-wipe small, isolated areas with an appropriate fungicidal product, following the label.
Remove porous items, including saturated carpets, plasterboard, insulation and soft furnishings, that you can’t clean effectively.
Double-bag waste, label it and arrange lawful disposal through your local authority or a licensed contractor.
Record what you remove, and address the moisture source to support lasting mould prevention.
For extensive contamination, use a specialist experienced in contaminated material removal.
Dry the Property Before Rebuilding
Don’t rebuild until the property’s moisture levels have returned to safe, stable readings. Drying too soon can trap hidden water, encourage mould and damage finishes. Arrange a qualified surveyor or specialist contractor to assess affected rooms, floors and cavities, then record readings with a calibrated moisture meter.
- Improve ventilation by opening windows when conditions allow, while maintaining security and heating safely.
- Use professional dehumidifiers and air movers; empty tanks regularly and follow electrical safety guidance.
- Check readings at set intervals across walls, floors and joinery, rather than relying on touch.
- Investigate persistent damp, condensation or musty smells before proceeding.
Keep drying equipment running until readings stabilise, not merely until surfaces appear dry. Only then should you plan interior decoration or aesthetic enhancements, allowing substrates and finishes to perform properly. Keep records for insurers and building-control discussions.
Choose Damp-Resistant Materials and Repairs
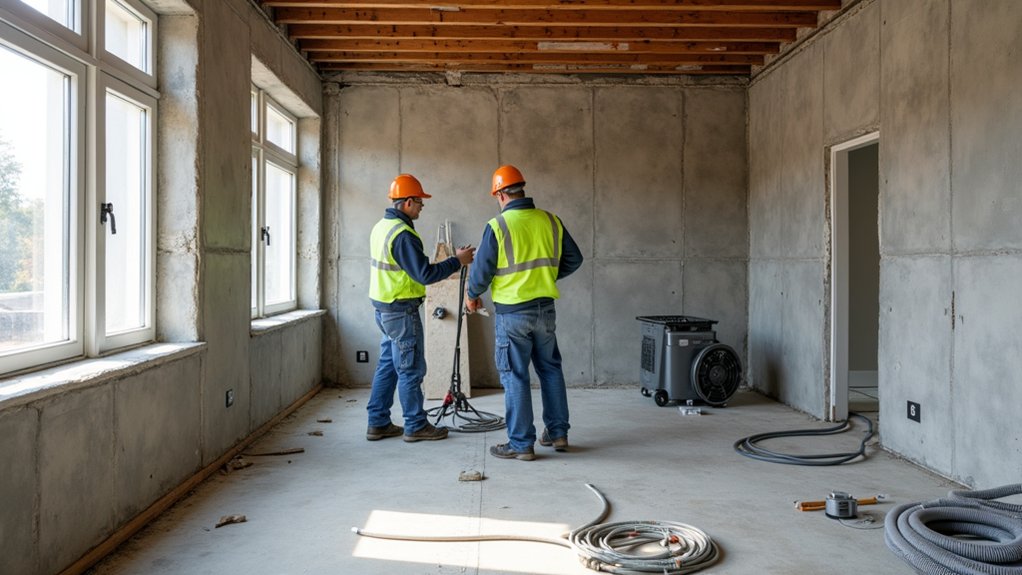
Choose moisture-resistant materials suited to the room, such as cement board, treated timber and mould-resistant coatings.
Repair leaks and damaged surfaces with waterproof solutions designed for UK conditions.
Don’t rebuild until each product is compatible with the existing structure and the moisture source is resolved.
Select Moisture-Resistant Materials
When refurbishing a damp or water-damaged property, select materials that can tolerate moisture and dry out safely rather than trapping water. Your choices should suit the building’s age, construction and exposure, following UK guidance and conservation requirements where applicable.
- Choose lime plaster and breathable masonry finishes for older solid-wall homes; avoid impermeable coatings that can push damp elsewhere.
- Specify treated, moisture-resistant timber, and keep it separated from persistently wet masonry until the structure has dried.
- Use cement board or other suitable non-absorbent boards in bathrooms, utility rooms and poorly ventilated areas.
- Plan Ventilation strategies alongside materials, allowing air movement behind cupboards and finishes. Install appropriate moisture barriers only where they’re compatible with the construction, detailing and intended use.
Check manufacturers’ data, ask a qualified surveyor about compatibility, and replace damaged components rather than concealing them. This approach supports durable repairs and healthier indoor conditions.
Repair With Waterproof Solutions
Use damp-resistant repair systems that suit the source of the water and the property’s construction, rather than applying a waterproof coating as a universal fix. Identify whether penetrating damp, rising damp, plumbing leaks or condensation causes the damage, then rectify it before repairs begin.
For basements and below-ground walls, ask a qualified specialist about tanking, cavity-drain membranes or a Type C drainage system.
Use breathable lime mortar and plaster in older solid-wall properties, avoiding cement-based finishes that can trap moisture.
Replace contaminated plasterboard, insulation and timber where necessary, and treat affected masonry with compatible products.
Follow British Standards and manufacturer guidance, and arrange independent inspections for serious damage.
Once dry, combine interior design choices with aesthetic enhancements, selecting mould-resistant paint and moisture-tolerant finishes that protect your renovation.
Prevent Future Water Damage After Renovation
To prevent future water damage, improve drainage around your property and keep gutters, downpipes, and surface water routes clear.
Seal vulnerable areas, including joints, cracks, windows, and service penetrations, using suitable materials for the UK climate.
Schedule routine inspections to identify leaks, blocked drainage, and emerging damp before they cause costly damage.
Improve Drainage Systems
Effective drainage is your best defence against recurring damp after renovation. Direct water away from walls and foundations before completing cosmetic work. Use this checklist:
- Check landscape grading: Ensure ground levels fall away from your property, not towards it. Regrade soil where necessary, while keeping paths and paving below damp-proof courses.
- Maintain gutters: Schedule gutter maintenance at least twice yearly, clearing leaves and checking joints, brackets and downpipes for leaks or blockages.
- Extend downpipes: Fit diverters or soakaway connections so roof water discharges safely, complying with local Building Regulations and avoiding neighbouring land.
- Inspect drainage channels: Clear gullies, French drains and channel drains regularly. Replace damaged covers and arrange a CCTV survey if water remains slow to drain.
Test the system during heavy rain, then record inspections in your maintenance plan. This helps you identify problems before they cause renewed damage.
Seal Vulnerable Areas
Once drainage is under control, seal openings where water could enter before you finish the renovation. Check roof coverings, flashings, gutters, window surrounds, doors, vents, pipe penetrations and below-ground walls.
Replace cracked mortar, failed sealant and damaged pointing with materials suited to the building and exposure. Use appropriate sealing techniques, such as exterior-grade mastic, proprietary collars and tanking systems, rather than relying on expanding foam alone.
Confirm windows and doors have sound weather seals, and fit drip bars where rain could track across thresholds. Don’t bridge the damp-proof course with render, paving or insulation.
Seal service penetrations carefully, but don’t block designed ventilation. Combine airtight repairs with sensible ventilation strategies, including extract fans in kitchens and bathrooms, to control condensation.
Follow product instructions and Building Regulations requirements throughout.
Schedule Routine Inspections
Schedule inspections at least twice a year, and more often after severe weather or during the first year following renovation. Good timing considerations include spring and autumn, when heavy rain can expose weaknesses. Your inspection frequency should also reflect the property’s age, previous damage and flood risk.
- Check gutters, downpipes, roof coverings and flashing for blockages, leaks or movement.
- Inspect sealant around windows, doors, pipes and newly repaired areas; replace cracked or detached material.
- Look for staining, bubbling paint, musty smells, mould and raised humidity indoors.
- Test sump pumps, drainage channels, alarms and shut-off valves, recording results and defects.
Don’t ignore minor changes. Photograph findings, arrange prompt repairs and retain reports for insurers and future work. If you spot structural movement, persistent damp or contaminated water, contact a qualified UK surveyor or specialist without delay.
Pay particular attention to basements and ground-floor walls.
Frequently Asked Questions
Can I Stay in the Property During Damp Damage Renovations?
You can stay, but only if professionals confirm the property’s safe. Arrange alternative living arrangements during mould removal, structural drying, or chemical treatment. Follow safety precautions, isolate work areas, ventilate rooms, and avoid contaminated spaces.
Do I Need Planning Permission for Renovating a Water-Damaged Property?
Usually, you won’t need planning permission for like-for-like repairs—but check first. You may need renovation permits for extensions, structural alterations, or listed buildings. Building regulations still apply, so contact your council before starting.
How Much Does Renovating a Damp or Water-Damaged Property Cost?
You’ll typically spend £10,000–£50,000, depending on damage, property size and location. Obtain specialist surveys, compare quotations, include contingency, and use cost estimation and budgeting strategies to manage structural repairs, drying, mould removal, and reinstatement.
Will Insurance Cover Repairs for Water Damage and Damp?
Insurance may cover sudden water damage, but usually not gradual damp, leaks, neglect, or poor maintenance. Check your policy’s Insurance claims process and Coverage limitations, document everything, notify your insurer promptly, and don’t begin repairs before approval.
How Long Does a Complete Damp Property Renovation Usually Take?
You’ll usually need three to nine months for a complete damp-property renovation. Moisture mitigation and mold remediation may take weeks; structural repairs, drying, approvals, and finishing can extend your UK project considerably.
Conclusion
Once you’ve traced the leak, secured the structure, removed contaminated materials and dried every hidden cavity, you can rebuild with confidence. Choose moisture-resistant products, seal vulnerable openings and improve ventilation so damp doesn’t return behind fresh finishes. Keep photographs, repair records and inspection dates; they’ll guide future maintenance and support insurance claims. With each careful step, the property should move from stale, shadowy rooms to a sound, breathable home, ready for Britain’s changing weather.