A Practical Conversion Guide for Turning an Old Granary Into Modern Living Quarters

An old granary often gives you more than rustic character; its open spans, tall roof, and sturdy frame can support a surprisingly comfortable home. Before you plan finishes, check the structure, secure planning and building approvals, and map a layout that uses light and space efficiently. You’ll also need to solve insulation, damp, ventilation, plumbing, heating, and power without erasing the building’s history. The right budget and sequence can determine whether that vision succeeds.
Key Takeaways
- Assess foundations, walls, roof timbers, floors, and movement before designing the conversion or estimating structural repairs.
- Confirm planning permission, listed-building consent, building regulations, heritage requirements, access, drainage, and environmental constraints.
- Design an efficient layout around existing structure, daylight, plumbing routes, circulation, and safe use of mezzanines or loft spaces.
- Install properly sized heating, electrical, plumbing, ventilation, alarm, and emergency systems through accessible, minimally invasive service routes.
- Preserve character by repairing original materials, using breathable finishes, improving insulation discreetly, and controlling costs with professional surveys.
Check the Granary’s Structure and Potential
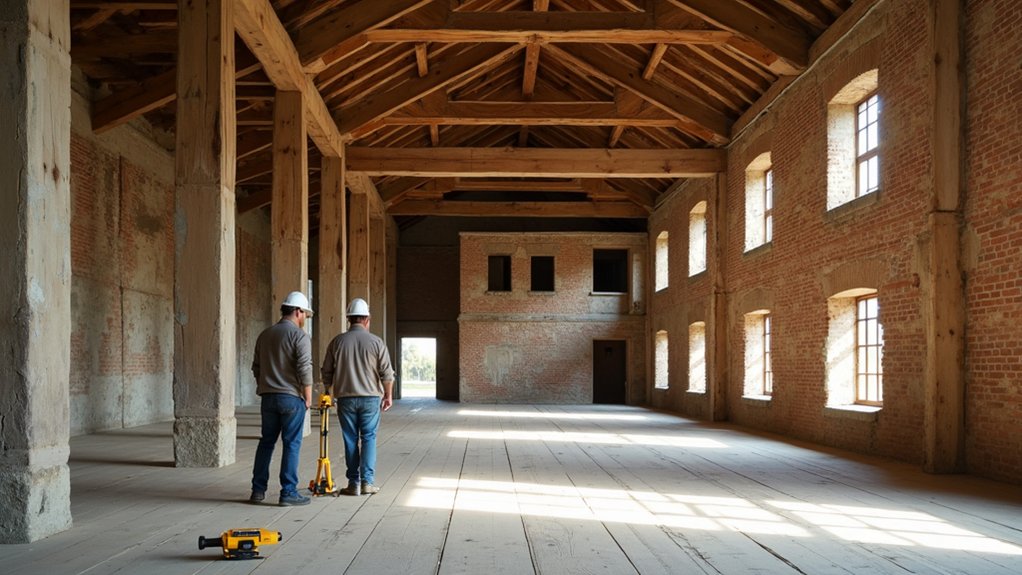
Before you plan the conversion, inspect the granary’s structure to determine what can be preserved, repaired, or replaced. Start by documenting its granary history, including alterations, previous repairs, and periods of neglect.
Examine foundations, wall joints, roof timbers, floor beams, and openings for movement, rot, insect damage, dampness, or corrosion. Look for bowed walls, cracked masonry, uneven floors, and sagging roof lines; these signs may indicate movement rather than surface wear.
Ask a qualified structural professional to assess load paths, bearing capacity, and structural integrity before you remove partitions or add new floors.
Check timber moisture levels and investigate drainage around the building. Then map sound materials and vulnerable areas, identifying reusable stone, beams, doors, and cladding.
This assessment will help you set realistic costs, priorities, and scope.
Secure Planning Permission and Building Approval
Before work begins, check whether your granary conversion needs planning permission, listed-building consent, or approval under local development rules.
You’ll need building approval to confirm that the design meets standards for structure, fire safety, insulation, ventilation, and access.
Speak with your local authority early and secure written approvals before appointing contractors.
Check Planning Requirements
Check with your local planning authority and building control department early, as converting an old granary may require both planning permission and building regulations approval.
Ask whether the proposed change from agricultural to residential use needs an application, and confirm applicable zoning regulations before you develop detailed designs.
Check the property’s listing status, conservation-area controls, flood risk, access requirements, and protected habitats or species.
Your authority may request a heritage statement, transport information, tree survey, drainage strategy, or environmental assessments.
Review local housing, parking, daylight, and energy policies, then discuss your plans through a pre-application service if available.
Keep written advice, application deadlines, drawings, ownership documents, and consultation records together.
Don’t assume an existing structure has automatic rights to residential conversion.
Inspections and technical compliance belong to the next approval stage.
Obtain Building Approval
Once you’ve confirmed the planning route, submit the required planning application and building regulations information with coordinated drawings and supporting documents. Include existing and proposed plans, elevations, sections, site access details, drainage proposals, and a clear design statement.
If the granary has heritage value, address historical preservation policies and explain how your work protects significant fabric.
Check local legal regulations for structural alterations, insulation, fire safety, ventilation, accessibility, and energy performance.
Appoint a building control body early, then provide calculations for foundations, beams, floors, and roof changes.
Your contractor shouldn’t start regulated work until approval is in place, unless your authority permits a formal notice route.
Respond promptly to requests for revisions, and keep approved drawings on site.
Record inspections, certificates, and final approval for future sales, insurance, and compliance.
Design a Practical Granary Living Layout

You’ll create a practical granary layout by assigning clear zones for cooking, sleeping, working, and circulation.
Use the building’s height for mezzanines, storage, or built-in shelving without restricting safe access.
Improve natural lighting with strategically placed windows, rooflights, and reflective finishes.
Plan Functional Zones
Before drawing walls or choosing finishes, map the granary’s functional zones around its existing structure, natural light, and access points. Note beams, posts, doors, and grain storage remnants before assigning uses; historical preservation may influence what you can alter.
Group activities by plumbing, ventilation, and daily movement, then keep service routes efficient.
- Place the kitchen near existing utility connections, with clear space for preparation, dining, and deliveries.
- Position the living area where windows provide comfortable daylight and views.
- Set bedrooms in quieter corners, away from entrances, appliances, and mechanical equipment.
- Locate the bathroom near plumbing lines, while protecting original floors, walls, and character-defining details.
Mark each zone on a scaled plan, including furniture footprints and door swings. Walk through morning, evening, and guest routines to test circulation.
If a zone feels cramped or disconnected, revise the arrangement before construction begins.
Maximize Vertical Space
With the functional zones mapped, use the granary’s height to add usable space without crowding the main floor. Measure the ceiling height at several points, since old roofs often sag or vary across the building.
Reserve the tallest central area for a compact sleeping loft, studio, or reading platform, and keep lower edges for cupboards, wardrobes, or mechanical equipment.
Design a stair or alternating-tread ladder with secure handrails, adequate headroom, and a clear landing. Use the space beneath stairs for drawers or pantry shelves rather than leaving it inaccessible.
Build loft storage on a reinforced platform, but confirm joist capacity and account for insulation, flooring, and stored loads.
Keep heavy items low, maintain safe clearance around beams, and provide a practical route for moving furniture upstairs.
Improve Natural Lighting
How can a dark, enclosed granary feel open without losing its character? Start with a lighting plan that follows your daily routine. Use window placement to capture morning and afternoon sun, while preserving solid wall sections for insulation and privacy. Consider tall, narrow windows between structural posts, and choose low-profile frames that complement the original timber.
A carefully planned skylight installation can brighten the central living area without sacrificing floor space. Add blinds to control summer heat and glare, and specify insulated glazing to reduce winter heat loss.
- Face kitchen windows east for gentle morning light.
- Place living-room openings south for longer illumination.
- Use roof windows above stairwells or mezzanines.
- Paint ceilings a warm, light-reflective color.
Check existing rafters before cutting openings, and reinforce altered members with an engineer’s guidance. Mirrors and glazed doors can distribute daylight deeper indoors.
Upgrade Insulation, Damp Protection, and Ventilation

Insulate the roof, walls, and floor with breathable materials suited to the granary’s construction, then control moisture with a damp-proof membrane, repaired gutters, and well-ventilated eaves.
Choose thermal insulation that allows older masonry and timber to release moisture rather than trapping it.
Before closing walls, inspect for rot, rising damp, and leaking joints; repair defects and let surfaces dry thoroughly.
Install moisture barriers carefully, lapping joints and sealing penetrations around structural elements.
Preserve airflow beneath floors and behind linings where the design requires it, but block drafts at doors and windows with suitable seals.
Add discreet cross-ventilation through opposing openings, and use humidity-controlled extract ventilation in kitchens and bathrooms.
Monitor humidity after completion with a hygrometer.
If condensation persists, improve airflow before adding thicker insulation or finishes.
Install Plumbing, Heating, Lighting, and Power
Once the building is dry and well ventilated, plan plumbing, heating, lighting, and power around the granary’s existing structure. Map routes before closing walls, and ask qualified tradespeople to verify load calculations, regulations, and emergency shutoffs. Group wet rooms to reduce pipe runs and protect vulnerable timbers from leaks.
- Run insulated supply and waste pipes through accessible service zones.
- Position water fixtures near a central manifold, with isolation valves for each branch.
- Choose a heat source sized by a room-by-room calculation, then balance radiators or underfloor circuits.
- Install electrical wiring in approved conduit, with dedicated circuits for cooking, heating, and appliances.
Fit smoke, carbon-monoxide, and heat alarms, and provide task lighting at stairs, worktops, and plant equipment. Test pressure, drainage, earthing, and residual-current protection before finishes conceal every connection.
Photograph hidden services for future repairs.
Preserve Character While Adding Modern Comforts
Keep the granary’s character by retaining sound beams, trusses, boards, doors, and ironwork, while upgrading comfort discreetly around them. Clean timber gently, repair rather than replace, and use breathable finishes that won’t trap moisture.
Expose selected masonry or boards, but insulate behind new lining where necessary to improve warmth without hiding every original surface. Choose modern windows with slender frames, or restore existing sashes and add secondary glazing.
Run cables, vents, and pipes through concealed routes, avoiding unnecessary cuts in historic fabric. Let kitchens and bathrooms use simple cabinetry, understated hardware, and durable natural materials that complement the building’s rustic charm.
Document alterations, consult local requirements, and distinguish new work subtly, supporting responsible historic preservation. You’ll create comfortable rooms that feel evolved, not newly manufactured, while protecting the granary’s practical heritage.
Set a Realistic Granary Conversion Budget
Set a realistic budget by commissioning a building survey, identifying structural repairs, and pricing insulation, services, windows, finishes, professional fees, permits, and contingencies before work begins. Your cost estimation should separate essential compliance work from optional upgrades, then add at least 15% for hidden defects, inflation, and design changes.
Request itemized quotes from contractors, confirm whether VAT applies, and avoid comparing incomplete allowances.
- Repairing roof timbers, masonry, and foundations
- Installing insulation, wiring, plumbing, heating, and ventilation
- Choosing windows, doors, flooring, and finishes through careful material selection
- Funding surveys, engineering, approvals, waste removal, and contingencies
Price each room and system rather than relying on a square-metre average. Check lead times and supplier warranties before committing.
Keep a cash reserve, review spending weekly, and approve variations in writing. This discipline helps you protect the granary’s character without sacrificing safety, comfort, or financial control.
Frequently Asked Questions
Can I Convert a Listed Granary or One Located Within a Conservation Area?
Yes, you can, but you’ll need listed-building consent or conservation-area approval before altering the granary. Check Heritage preservation requirements, Building regulations, planning policy, surveys, and specialist advice; unauthorized work can trigger enforcement and criminal penalties.
What Insurance Coverage Is Needed During and After a Granary Conversion?
You’ll need renovation insurance covering structural works, public liability, contractors, and unoccupied-property risks. Afterward, switch to buildings and contents insurance, confirming historic preservation requirements, building regulations, listed status, and completed-value rebuilding costs.
How Long Does a Typical Granary Conversion Project Take?
You’ll typically need six to twelve months: steel shell outside, livable rooms inside. Planning, permits, structural repairs, utilities, Interior design, and Energy efficiency upgrades can extend timelines, especially when weather or specialist availability intervenes.
Can I Live in the Granary While Renovation Work Is Underway?
You can live in the granary during renovations, but only if you’ve isolated safe, weatherproof rooms and maintained utilities. Prioritize DIY safety, coordinate contractors, manage dust, and include temporary accommodation in budget planning for disruptions.
Which Professionals Should I Hire for a Granary Conversion?
You’ll need an architect, structural engineer, contractor, electrician, plumber, and insulation specialist. Don’t assume traditional buildings are simple: Historic preservation expertise and a thorough Structural assessment prevent costly surprises, code violations, and unsafe renovation decisions.
Conclusion
Your granary conversion can become more than a renovation—it can give an old structure a new chapter. If you assess the frame, secure approvals, plan each service route, and protect against damp, you’ll avoid costly surprises. Let reclaimed timbers and original openings retain the building’s character, while efficient insulation, heating, and lighting deliver modern comfort. Like turning a rough sheaf into sustenance, careful budgeting and sequencing will transform this former storehouse into a durable, welcoming home.