
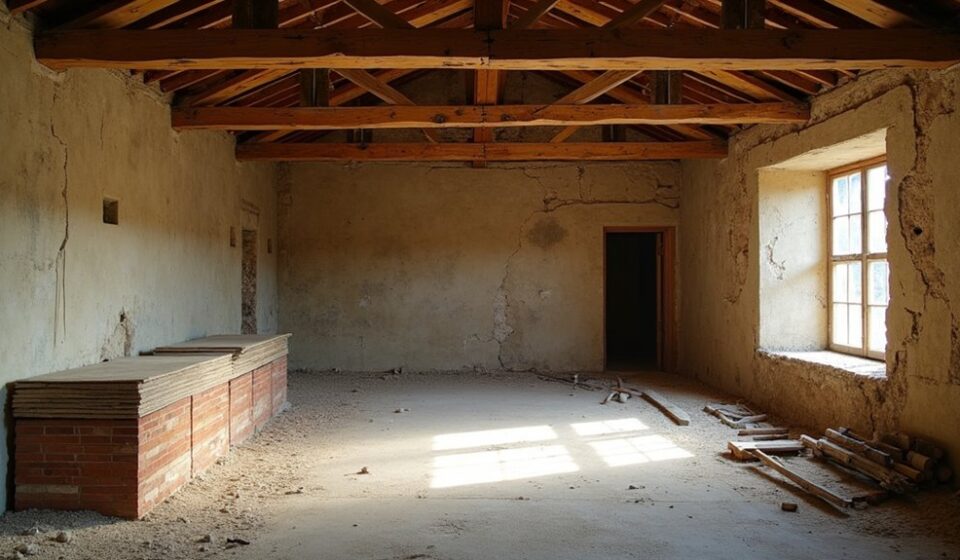

Renovating a derelict outbuilding starts with more than clearing debris and applying fresh paint. You’ll need to assess the structure, identify hazards, define a realistic use and budget, and confirm which permissions apply. From stabilising the shell and controlling damp to installing utilities and finishing the interior, each stage affects the next. Follow the right sequence, or hidden defects can undermine your work—and cost far more to correct later.
Key Takeaways
- Inspect the outbuilding’s structure, roof, drainage, walls, windows, and hazards; document defects and consult a structural engineer when necessary.
- Clear debris safely, arrange hazardous-material removal, stabilize unsafe areas, and salvage reusable fixtures and building materials.
- Define the intended use, prepare a budget with contingencies, compare detailed contractor estimates, and obtain required planning and building approvals.
- Repair the roof, masonry, floors, drainage, and external envelope before addressing dampness, insulation, ventilation, or interior finishes.
- Install compliant utilities, heating, lighting, alarms, durable finishes, secure storage, and practical furnishings before completing safety checks and final testing.
Assess the Outbuilding’s Structure and Condition

Before planning finishes or furnishings, inspect the outbuilding’s structural condition from the ground up. Check the foundation for settlement, cracking, dampness, and displaced masonry.
Examine walls for bowing, weakened joints, insect damage, and rot, then test whether framing feels sound.
Inspect roof coverings, rafters, gutters, and flashing for leaks or sagging.
Look closely at windows, doors, chimneys, and exterior cladding, where water often enters unnoticed.
Don’t disturb lead paint, mold, or suspected asbestos; arrange professional testing and safe removal.
Document defects with photographs, measurements, and notes, and identify features worth retaining for Historic preservation.
A structural engineer or qualified building inspector should evaluate serious movement, decay, or load concerns.
This assessment protects safety and guides aesthetic enhancement without concealing problems beneath new materials or finishes.
Define the Space’s Purpose and Renovation Budget
Decide how you’ll use the outbuilding before selecting materials or requesting estimates. Will you create a home office, workshop, guest room, studio, or storage area? Your answer determines insulation, heating, lighting, plumbing, finishes, and accessibility requirements.
List essential functions, then separate desirable upgrades so you can protect the budget when costs rise.
Set a realistic renovation budget by pricing structural repairs, utilities, insulation, windows, doors, interior finishes, labor, equipment, and waste removal. Add a contingency of at least 15 percent for concealed damage discovered during construction.
Obtain several detailed estimates, but compare scope and quality rather than choosing the lowest figure.
Allocate funds for historic preservation if original masonry, timber, or doors deserve careful repair. Reserve a separate allowance for aesthetic enhancement, such as lighting, flooring, and paint, after essential work is funded.
Revisit your priorities before committing.
Check Planning Permission and Building Regulations
Check with your local planning authority and building control department before work begins, because converting an outbuilding may require planning permission, building regulations approval, or both. Explain your intended use, drawings, dimensions, and services, and ask which applications and certificates you’ll need.
Check these factors early:
- Use: A workspace, rental unit, or bedroom may trigger different requirements.
- Building height: Increasing the roof, adding dormers, or changing the profile can affect permitted development rights.
- Boundary restrictions: Nearby boundaries, shared walls, protected sites, and conservation areas may limit alterations.
- Standards: Building regulations can govern structure, insulation, ventilation, fire safety, drainage, and electrical work.
Request written confirmation rather than relying on informal advice. Keep approved plans, decision notices, inspection records, and completion certificates with your project documents. If rules seem unclear, consult a planning consultant or building professional before committing to contractors or materials.
Clear, Stabilise, and Prepare the Building
Once you’ve confirmed the permissions and approvals, clear the outbuilding so you can inspect its condition safely and accurately. Wear gloves, eye protection, a mask, and sturdy footwear, and work with adequate ventilation.
Remove rubbish, loose contents, vegetation, and pests, separating reusable materials from waste. Don’t disturb suspected asbestos, lead paint, mould, or contaminated debris; isolate the area and arrange specialist testing and removal.
Record cracks, damp marks, movement, timber decay, and unstable elements with photographs and notes, but don’t begin structural repairs yet. Support visibly unsafe sections only with temporary measures designed by a competent professional, and keep people away from danger zones.
Salvage sound fixtures where practical, supporting historic preservation and environmental sustainability. Finally, establish safe access, lockable storage, temporary lighting, and a clean, organised workspace before construction begins.
Repair the Roof, Walls, Floors, and Drainage

Start with the roof, because water ingress will undermine every other repair if you leave it unresolved. Inspect rafters, tiles, flashing, and gutters, then complete roof repair with compatible materials. Replace broken tiles and secure sound ones; don’t seal defects before you understand their cause.
Next, stabilise masonry and remove only loose, failed material. Wall restoration should match the existing construction, mortar strength, and brick type. Repair cracks structurally, not cosmetically.
Rebuild damaged corners and openings before finishing surfaces.
Compact or replace failed floor areas, checking levels and load capacity.
Clear drains, repair channels, and direct runoff away from walls.
Test every repaired route during heavy rain before closing up.
Finish floors with durable, level surfaces suited to the building’s future use.
Keep records of concealed repairs, and obtain specialist advice where movement, major timber decay, or unsafe masonry remains.
Add Insulation, Ventilation, and Damp Protection
Choose insulation suited to your outbuilding’s construction, climate, and intended use.
Improve airflow with properly placed vents to control condensation, and don’t block existing ventilation routes.
Prevent damp problems by sealing leaks, protecting walls and floors, and installing a suitable damp-proof barrier.
Choose Suitable Insulation
Insulation keeps a renovated outbuilding comfortable, but it must work with proper ventilation and damp protection rather than trap moisture inside the structure.
First, inspect walls, the roof, and floor for leaks, rising damp, and damaged masonry. Repair those defects before choosing insulation materials.
Select products that suit the building’s construction, budget, and intended use:
- Mineral wool resists fire and fits irregular stud spaces.
- Rigid boards provide strong thermal performance where space is limited.
- Wood-fibre boards offer a more breathable option for traditional masonry.
- Floor insulation reduces heat loss and improves comfort underfoot.
Use insulation techniques that avoid compressing materials or leaving gaps.
Install a continuous vapour-control layer where the design requires one, sealing joints around openings and services.
Keep insulation clear of damp surfaces, and follow manufacturer guidance for thickness, fixings, and fire protection.
A building-control professional can confirm your specification before installation.
Improve Airflow
Good airflow depends on balancing insulation with controlled ventilation and reliable damp protection. After insulating your outbuilding, seal unintended gaps around doors, windows, and service penetrations, but don’t make the room airtight.
Install background vents or trickle vents to provide a steady supply of fresh air, then add high-level extraction where heat and moisture collect. Use cross ventilation by placing openings on opposite walls, allowing air to move through the building rather than stagnate in corners.
Keep vents clear, and choose adjustable grilles so you can regulate airflow during colder weather. If you’ll heat the space, fit insulation continuously around the roof and walls, leaving designed ventilation channels above it.
Monitor air circulation with a simple hygrometer, and adjust extraction or vent settings when readings stay elevated. Guarantee every fan exhausts outdoors, not into roof voids.
Prevent Damp Problems
Prevent damp problems by combining continuous insulation with controlled ventilation and effective moisture barriers. Seal gaps around windows, doors, and service penetrations, then insulate walls and the roof without compressing the material. Maintain airflow behind finishes so trapped vapour can escape, and install vents high and low where the building’s design allows.
- Use moisture barriers on the warm side of insulated walls, following the manufacturer’s detailing.
- Keep gutters, downpipes, and ground levels directing water away from the outbuilding.
- Choose breathable paints on masonry so residual moisture can evaporate rather than blistering coatings.
- Monitor humidity with a hygrometer and ventilate whenever readings stay consistently high.
Before closing walls, investigate salts, staining, or soft timber. Repair leaks and allow damp masonry to dry fully; insulation won’t solve an active water source.
Fit extract ventilation in kitchens, bathrooms, or utility areas, and avoid blocking existing vents.
Install Safe Electricity, Plumbing, and Heating
Plan the electrical system with adequate circuits, outlets, grounding, and code-compliant protection.
Install plumbing with proper supply lines, drainage, insulation, and leak prevention, using a qualified professional where required.
Choose efficient heating that suits the space, fuel source, ventilation needs, and safety requirements.
Plan Electrical Systems
Before you close the walls, map every electrical need, including lighting, outlets, dedicated appliance circuits, and exterior fixtures. Have a licensed electrician inspect the existing supply, calculate loads, and confirm the outbuilding’s cable route, earthing, and panel capacity. Don’t conceal unsafe wiring or rely on guesswork.
- Separate lighting, general outlets, heating, and high-load equipment onto appropriate circuits.
- Specify weatherproof fittings, ground-fault protection, and exterior-rated cable where exposure is possible.
- Plan switch locations, emergency shutoffs, ventilation, and accessible junction boxes before boarding.
- Consider wireless lighting and smart home integration, but provide reliable power and manual controls.
Use approved materials and follow local codes, permits, and inspection requirements. Label every circuit at the consumer unit, photograph concealed runs, and leave capacity for future equipment.
Coordinate electrical work with structural repairs, insulation, and fire protection so the finished space remains safe, serviceable, and adaptable for years.
Install Safe Plumbing
With the electrical layout established, install plumbing that suits the building’s use without compromising its structure. Confirm your water supply, drainage route, and local code requirements before cutting walls or floors.
Use appropriately sized, certified pipes, and support every run to prevent movement and stress at joints. Protect vulnerable lines with pipe insulation, particularly where temperatures could fall below freezing.
Add accessible isolation valves near fixtures and at key branches, so you can shut off sections quickly during repairs. Prioritize leak prevention by using compatible fittings, sealing threaded connections correctly, and pressure-testing the system before closing walls.
Provide proper traps, vents, and gradients for waste pipes to prevent odors and blockages. Keep plumbing separate from electrical cables, and leave access panels at concealed valves or service connections.
Choose Efficient Heating
Choose a heating system that matches the outbuilding’s size, insulation, occupancy, and available energy supply. Before installation, seal drafts, upgrade insulation, and confirm the floor and wall construction can safely support equipment.
Heat pumps offer efficient heating and cooling, while solar heating can reduce running costs when the roof receives sufficient sunlight. Use qualified installers for gas, electrical, or refrigerant work, and follow local regulations.
- Select thermostatic controls so you heat rooms only when needed.
- Keep heaters clear of furniture, storage, curtains, and combustible materials.
- Provide adequate ventilation for combustion appliances, never blocking vents.
- Install smoke, carbon-monoxide, and frost-protection alarms where appropriate.
Position radiators or indoor heat-pump units to distribute warmth evenly, then test every control before regular use.
Protect external pipes against freezing, label isolation switches, and schedule annual servicing. Your heating plan should prioritize safety, efficiency, and straightforward maintenance.
Finish the Interior for Comfort and Practicality
Once the structure is sound and weatherproof, finish the interior with materials that balance comfort, durability, and easy maintenance. Insulate walls and ceilings thoroughly, then cover them with plasterboard, plywood, or tongue-and-groove boards suited to the room’s purpose.
Choose hard-wearing flooring, such as sealed concrete, engineered timber, or quality vinyl, and seal porous surfaces against moisture and stains.
Plan lighting in layers: combine bright task lighting with softer ambient fixtures to make the space welcoming. Use paint colors that reflect available daylight and select washable finishes for busy areas.
Thoughtful furniture placement will preserve circulation, define zones, and prevent the room from feeling cramped. Add shelving, cupboards, and hooks to keep equipment organized.
Finally, personalize the space with carefully chosen Decorative finishes, including textiles, artwork, and trim.
Make the Renovated Outbuilding Safe and Usable
A comfortable interior still needs to be safe and practical in daily use. Test every socket, switch, appliance, and light fitting, and have a qualified electrician correct faults. Check doors, windows, locks, steps, and handrails; repair anything loose or difficult to operate. Improve ventilation, install suitable heating, and fit smoke and carbon-monoxide alarms. Keep escape routes clear and mark the main shut-off points.
- Choose non-slip flooring for entrances and wet areas.
- Add task lighting where you work, store tools, or climb steps.
- Secure shelves, cabinets, and heavy equipment against tipping.
- Display emergency contacts and keep a first-aid kit accessible.
Inspect the roof and drainage after heavy weather, watching for leaks or damp. Finish with a durable Decorative exterior, then plan Landscaping enhancements that keep paths level, illuminated, and clear of overgrowth. Confirm local safety and building requirements before regular use.
Frequently Asked Questions
Can I Renovate an Outbuilding Myself, or Should I Hire Professionals?
You can renovate an outbuilding yourself if you’ve got suitable skills, time, and DIY safety knowledge. Hire professionals for structural, electrical, plumbing, or hazardous work, and prioritize careful contractor selection for reliable results.
How Long Does Renovating a Derelict Outbuilding Typically Take?
You’ll typically need three to twelve months, depending on size, damage, planning approvals, and contractor availability. Historical preservation requirements, structural repairs, weather, and sourcing Sustainable materials can extend your schedule, so build in contingency time.
Will Renovating an Outbuilding Increase My Property’s Value?
Yes, renovating an outbuilding can increase your property’s value when you add practical space, improve safety, and match local demand. Include landscaping ideas, respect historical preservation, and document quality work to strengthen buyer appeal and returns.
Can I Convert an Outbuilding Into a Residential Rental Unit?
Yes, you can convert an outbuilding into a residential rental unit, but you’ll need permits, code-compliant utilities, and approval under zoning regulations. Check Historical preservation requirements, parking rules, occupancy limits, and rental licensing before starting construction or marketing.
What Insurance Coverage Is Needed During Outbuilding Renovation?
You’ll need renovation coverage, including builder’s risk, general liability, and workers’ compensation. Confirm insurance requirements with your insurer, protect materials and equipment, and update coverage before tenants move in. Laws and policies vary locally.
Conclusion
Renovating a derelict outbuilding may seem costly and complicated, but careful staging keeps the work manageable. Once you’ve assessed the structure, secured permissions, repaired defects, and controlled moisture, you can create a safe, practical room rather than another maintenance problem. Don’t rush the finishing touches: test utilities, improve ventilation, install alarms, and check every access point. With sensible materials and regular inspections, your transformed outbuilding will deliver useful, comfortable space for years.


