Your driveway is the first line of defense against weather, traffic, and time, so small problems won’t stay small for long. Inspect it regularly for cracks, potholes, crumbling edges, and drainage issues, then make prompt repairs before damage spreads. Clean and prepare the surface before applying the right sealer, and control weeds to protect joints and edges. With a seasonal maintenance plan, you’ll prevent costly deterioration—but one overlooked step can undermine it all.
Key Takeaways
- Inspect your driveway regularly, especially after severe weather, to catch cracks, potholes, drainage issues, erosion, and uneven areas early.
- Repair cracks and potholes promptly by cleaning, filling, patching, and compacting damaged sections before water and freezing temperatures worsen them.
- Remove weeds, roots, leaves, soil, oil, and debris regularly to prevent plant growth and keep the surface clean for repairs and sealing.
- Choose a compatible sealer, apply thin, even coats to a completely dry surface, and follow curing instructions before allowing vehicle traffic.
- Adapt maintenance seasonally by clearing debris, managing drainage, limiting de-icer, using plastic tools, and scheduling professional repairs for extensive damage.
Inspect Your Driveway for Damage

Regularly inspect your driveway for cracks, potholes, uneven areas, and drainage problems. Walk the entire surface after rain, when standing water reveals low spots, blocked channels, or poor runoff.
Check edges for crumbling, separation, and soil erosion, and look for loose gravel or shifting sections. Use a straightedge to identify subtle unevenness that could create trip hazards or affect vehicle access.
Examine areas beneath trees, near downspouts, and beside retaining walls, where roots and concentrated water often affect surface stability.
Record your observations with dated photos, noting each location and its apparent severity. Routine inspections protect driveway aesthetics and support effective Landscaping integration by showing where beds, borders, or drainage features may be affecting the pavement.
Schedule professional evaluation when movement, sinking, or drainage remains unclear.
Repair Cracks and Potholes Early
Repair damage as soon as you spot it to prevent cracks and potholes from spreading.
Clean and fill narrow cracks with suitable sealant, and patch potholes before water and traffic enlarge them.
Regular repairs’ll protect your driveway and reduce costly maintenance.
Identify Damage Early
Small cracks and potholes can expand quickly when water seeps beneath the surface and repeated traffic weakens the pavement. Inspect your driveway regularly, especially after heavy rain, freezing weather, and periods of intense use.
Look for hairline cracks, widening joints, loose edges, shallow depressions, and areas where the surface feels uneven. Check low spots for standing water, which often signals drainage issues that can accelerate deterioration.
Watch for surface erosion along edges and near downspouts, where runoff may wash away supporting material. Mark concerning areas so you can monitor their growth and schedule professional assessment when damage spreads, sinks, or exposes the base.
Early detection helps you plan maintenance before minor defects compromise larger sections. Don’t ignore changes; prompt attention protects your driveway’s structure and reduces repair costs.
Fill Cracks and Potholes
Once you spot cracks or potholes, fill them before water and traffic enlarge the damage. Clean each area thoroughly, removing dirt, weeds, loose asphalt, and crumbling edges.
For narrow cracks, apply a suitable asphalt crack filler when the surface is dry, then smooth it level with a putty knife or squeegee. Larger gaps may need cold-patch material compacted firmly in thin layers.
For effective pothole filling, square off unstable edges, clear standing water, add patch mix, and tamp it repeatedly until firm and slightly crowned. Follow the product’s temperature and curing instructions.
Addressing damage promptly limits crack expansion, prevents moisture from reaching the base, and reduces repair costs. Check repaired areas after heavy rain and traffic, and refill or compact them if settling creates low spots.
Prepare the Surface Before Sealing
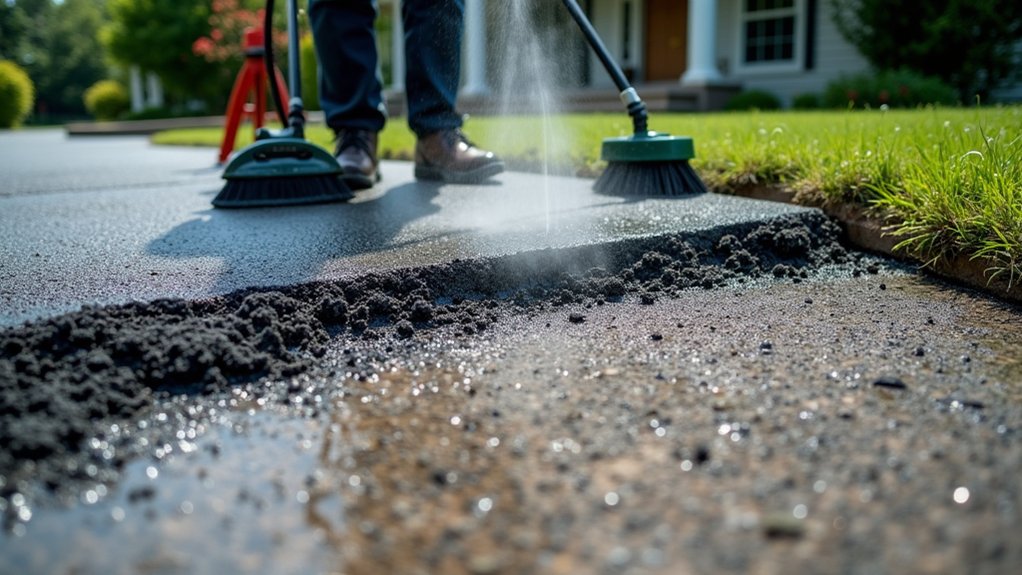
Before sealing, clean the driveway thoroughly to remove dirt, leaves, oil, and loose debris. Sweep the entire surface, then pressure-wash stubborn grime without forcing water into cracks or weakened edges.
Treat oil stains with a suitable degreaser, scrub thoroughly, and rinse until no residue remains.
Remove weeds from joints and edges, including their roots, so they won’t push through the fresh coating.
Allow the driveway to dry completely; trapped moisture can cause bubbling, peeling, or uneven adhesion.
Inspect the repaired cracks and potholes, and make sure their patching material has cured according to the manufacturer’s instructions.
Surface preparation also includes checking for loose aggregate and brushing it away.
Finally, confirm Sealant compatibility with the existing surface and any repairs before applying anything, and follow the product’s temperature and weather requirements.
Choose the Right Driveway Sealer
Choose a sealer type suited to your driveway’s material and condition. Check surface compatibility before applying it.
Then compare each product’s durability and finish to your maintenance needs. This choice helps protect the surface and extend its service life.
Consider Sealer Type
The right driveway sealer depends on your surface, climate, and maintenance goals. Sealer types include penetrating, film-forming, acrylic, coal-tar, and asphalt-based formulas.
Choose a penetrating product when you want water resistance without changing the driveway’s appearance considerably.
Select a film-forming sealer when you need stronger protection from moisture, oxidation, and chemical spills, but understand that it may create a visible finish.
Acrylic formulas can add color and sheen, while asphalt-based options provide a traditional, durable coating.
Read the product label carefully for expected service life, drying time, and recommended weather conditions.
Follow the manufacturer’s application techniques, including thorough mixing, controlled coverage, and proper curing time.
Don’t choose solely by price; a suitable formula reduces maintenance and helps your driveway withstand seasonal wear.
Check Surface Compatibility
Check whether your sealer matches the driveway’s surface before applying it. Material compatibility prevents poor bonding, peeling, and contamination. Identify whether you have asphalt, concrete, pavers, or an existing sealed surface, then read the product label for approved substrates. Don’t assume a sealer designed for asphalt will work on concrete.
Use these checks:
- Perform Surface testing on a clean, inconspicuous area and let it cure as directed.
- Confirm the surface is sound, dry, and free from oil, dust, loose coating, and curing compounds.
- Check whether previous sealers are compatible; remove failing layers rather than covering them.
If the test patch softens, discolors, flakes, or remains tacky, stop and choose another product. Follow the manufacturer’s preparation requirements, including cleaning and drying times.
When the substrate or old coating is uncertain, ask the manufacturer or a paving professional before sealing.
Compare Durability And Finish
Compare each sealer’s expected service life and finish before buying, since the right product must withstand your driveway’s traffic, weather, and maintenance demands. For a useful durability comparison, check the label for resistance to ultraviolet rays, water, oil, tire marks, and freeze-thaw cycles.
Acrylic sealers generally offer affordable protection and quick drying, while coal-tar or asphalt-based formulas typically provide tougher moisture resistance. Choose a product rated for your pavement type and local climate, not simply the cheapest option.
Finish options include matte, satin, and glossy surfaces. A matte finish hides minor imperfections, whereas glossy coatings can deepen color but may highlight cracks and show tire scuffs.
Confirm whether the sealer includes nonslip additives, especially on sloped driveways. Follow coverage and recoat instructions carefully; applying too thick a layer can peel prematurely and shorten the sealer’s service life.
Apply Driveway Sealer Correctly
Once the driveway is clean, dry, and free of cracks that need repair, apply sealer on a mild, dry day. Check the forecast for at least 24 hours without rain, and confirm the pavement temperature meets the product label’s requirements.
Thorough surface preparation determines how well the coating bonds, so remove dust and rinse away residue before allowing the driveway to dry completely.
- Stir the sealer slowly; don’t whip air into it.
- Use a squeegee for even coverage, working in thin, overlapping sections.
- Keep edges neat, and avoid puddles that may dry unevenly.
Follow the manufacturer’s coverage rate rather than adding a heavy coat.
Let the first application cure as directed before permitting vehicles onto the surface.
During sealant application, maintain a steady pace and protect nearby walls, garage doors, and landscaping from splashes.
Remove Weeds and Prevent Regrowth
Weeds often take root along driveway edges and in small cracks, where they can widen gaps and undermine the pavement. Pull small growth promptly after rain, when loosened soil makes root removal easier. Use a narrow weeding tool to lift roots from cracks without damaging surrounding pavement.
For stubborn plants, cut them at the base, then apply an appropriate spot treatment according to the product label. Don’t let chemical spray contact nearby grass, plants, or fresh sealer.
Once the area is clear, sweep out soil and debris, then fill narrow cracks with a compatible crack filler. Keep edges trimmed, remove fallen leaves, and clear dirt regularly to limit new seeds.
Effective weed prevention depends on frequent inspection and quick action, not occasional heavy treatment. Check repaired areas regularly and address returning growth immediately.
Follow a Seasonal Driveway Care Plan
A seasonal care plan helps you catch driveway problems before weather and traffic make them worse. Build routine inspections into your calendar, then match each task to seasonal risks. Consistent seasonal maintenance protects the surface, improves safety, and preserves driveway aesthetics.
- Spring: Clear leaves, grit, and weeds. Inspect for cracks, potholes, drainage issues, and frost damage. Repair defects before water penetrates.
- Summer: Remove stains promptly, control regrowth, and seal the driveway when conditions are dry and temperatures suit the product. Keep heavy vehicles off fresh sealant.
- Autumn and winter: Sweep away falling leaves, clean drains, and repair cracks before freezing weather. Use snow shovels or plastic tools, and apply de-icer sparingly to limit surface damage.
Record completed work and schedule professional repairs when damage exceeds your skills. Regular checks cost less than emergency restoration and keep your driveway functional year-round.
Frequently Asked Questions
Can Driveway Repairs Be Completed During Rainy or Freezing Weather?
You shouldn’t complete most driveway repairs during rain or freezing weather. Weather considerations affect curing and adhesion; prioritize Repair timing when surfaces stay dry, temperatures remain suitable, and forecasts provide enough stable conditions.
How Much Does Professional Driveway Maintenance Typically Cost?
You’ll typically spend $100–$500 for professional driveway maintenance, depending on size and condition. Request a Cost comparison, then evaluate Service packages covering cleaning, crack repairs, sealing, and weed control to protect your investment.
When Should I Replace My Driveway Instead of Repairing It?
Replace your driveway when cracks, potholes, drainage failures, or shifting affect most of its surface, repairs recur, or safety suffers. Consider Driveway aesthetics and Material durability, then compare replacement costs with ongoing maintenance and repairs.
Are Certain Driveway Materials Better Suited for Heavy Vehicle Traffic?
Heavy trucks test driveways like marathon runners test shoes. Concrete and asphalt offer strong Material durability; choose reinforced concrete for frequent loads. Gravel suits lighter traffic. Match Traffic suitability to vehicles, then maintain, seal, and repair promptly.
Can Driveway Maintenance Affect Nearby Plants, Pets, or Drainage Systems?
Yes, driveway maintenance can affect plants, pets, and drainage. Protect plant safety by controlling chemicals, contain runoff, keep pets away while products cure, and assess drainage impact to prevent pooling, erosion, or contamination.
Conclusion
Keep your driveway strong by treating small problems before they spread. Inspect it regularly, fill cracks and potholes, clear weeds, and prepare the surface carefully before sealing. Choose a compatible sealer and apply it only to clean, dry pavement for lasting protection. With seasonal checks and prompt repairs, you’ll prevent water from working beneath the surface and turning minor flaws into crumbling damage. A little maintenance now keeps your driveway smooth, clean, and ready for every arrival.