
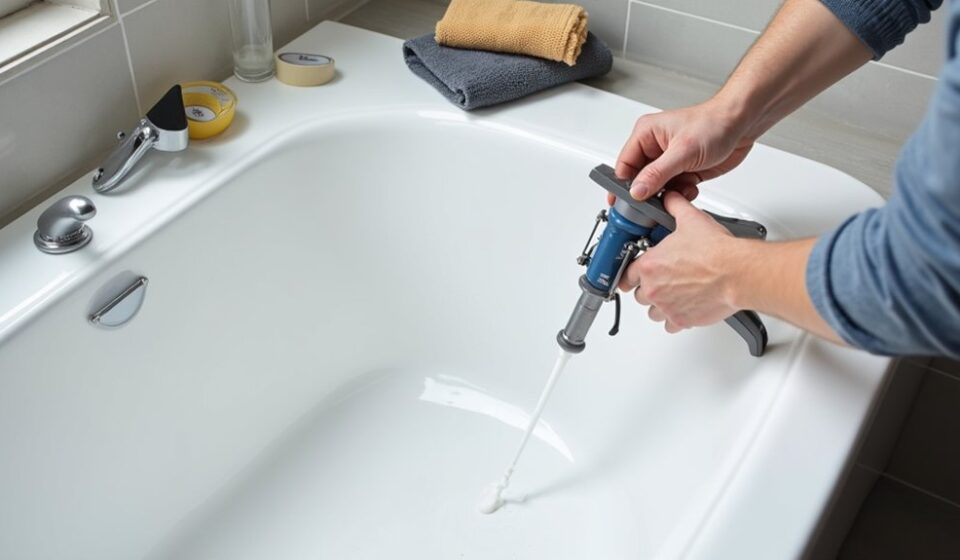

Resealing around baths, sinks, and showers is a straightforward maintenance task, but the result depends on careful preparation. You’ll need to identify hidden moisture, remove every trace of old sealant, and choose a mildew-resistant product suited to the surface. A clean, dry joint and an even bead are essential for preventing leaks and achieving a professional finish. Follow each stage carefully, because one overlooked problem can undermine the new seal.
Key Takeaways
- Inspect for leaks, mold, or structural damage, and repair underlying problems before removing old sealant.
- Remove the existing sealant carefully, then clean the joint thoroughly and ensure every surface is completely dry.
- Choose sanitary, mildew-resistant silicone compatible with your bath, sink, shower, and surrounding surfaces.
- Apply a continuous, even bead, smooth it promptly, and remove masking tape before the sealant skins over.
- Keep the area dry and undisturbed for the manufacturer’s recommended curing period before testing for leaks.
Gather Tools and Choose the Right Sealant

Before you begin, gather a utility knife or caulk-removal tool, a scraper, cleaning cloths, rubbing alcohol, masking tape, a caulking gun, and a damp sponge. Check each item so you won’t stop midway. Careful tool selection helps you remove old material cleanly and apply an even bead. Choose a sharp, controllable cutter, a rigid scraper for residue, lint-free cloths, and a smooth-trigger caulking gun.
Compare sealant types before buying. Use 100% silicone sealant for baths, showers, and sinks because it remains flexible and resists moisture. Select sanitary silicone containing mildew-resistant additives, and match its label to your surface, such as ceramic, glass, porcelain, or acrylic.
Avoid decorator’s caulk in constantly wet areas. Choose a color that complements the fixture, and check the tube’s curing instructions, application temperature, and expiry date. Keep masking tape ready for neat edges.
Check for Leaks and Hidden Water Damage
Once you’ve gathered your tools and sealant, inspect the joint for active leaks or signs of hidden water damage. Dry the surrounding surfaces, then run a cloth along the seam to find dampness. Turn on the tap or shower and watch the joint closely while water reaches the area.
Check beneath sinks, around bath panels, and behind accessible pipework for drips, staining, swollen cabinets, soft flooring, peeling paint, or a musty smell. Effective Leak detection requires patience, so repeat the test and use a flashlight to examine dark corners.
Don’t reseal over an active leak; identify its source first and repair the plumbing or fitting. If materials feel soft or damage extends beyond the surface, stop and contact a qualified professional.
Allow everything to dry fully before continuing.
Remove Old Sealant Around Baths and Sinks
Gather a utility knife, sealant-removal tool, scraper, gloves, and suitable cleaner before you start.
Soften stubborn sealant with a manufacturer-approved remover, then cut along both edges to loosen it.
Scrape away the residue carefully, clean the bath or sink surface thoroughly, and let it dry completely.
Gather Removal Tools
Removing old sealant is easier when you have the right tools ready: use a sharp utility knife or sealant-removal tool to cut through the bead, a plastic scraper to lift softened residue without scratching the bath or sink, and fine tweezers or a small pick for stubborn fragments.
Add a flashlight so you can inspect corners and joints clearly. Keep a rubbish bag, cloths, and gloves nearby to control debris and protect your hands.
Choose tools suited to the surface and check sealant compatibility before selecting replacement products; unsuitable materials may damage acrylic, enamel, stone, or metal.
Practise safe tool maintenance: guarantee blades remain sharp, retract or cover them after use, and clean scrapers between tasks. Don’t use metal blades on delicate finishes or force embedded pieces.
Soften Old Sealant
Start by softening the old sealant so it releases cleanly from the bath, sink, and adjoining surfaces. First, identify the sealant types. Silicone usually feels rubbery and resists water, while acrylic or latex caulk feels softer and may respond to gentle heat.
Use a hairdryer on its lowest setting, keeping it moving and several inches away from the surface. Warm a short section for 30–60 seconds, then test whether the bead flexes. Don’t use an open flame, heat gun, or excessive pressure, especially near plastic, painted finishes, or laminate.
For stubborn silicone, apply a purpose-made sealant softener along the bead, following the product’s instructions and ventilation requirements. Protect nearby surfaces with masking tape, and keep the area dry.
Choose softening techniques suited to the material, fixture, and surrounding finish.
Scrape And Clean
Once the softened bead begins to lift, pull it away slowly and cut through any bonded sections with a sharp utility knife or plastic scraper. Keep the blade almost flat to avoid scratching acrylic, enamel, ceramic, or painted surfaces.
Remove remaining strips with tweezers, then use a plastic scraper to dislodge stubborn residue. Don’t force the tool into joints or corners; controlled pressure protects the bath or sink.
Check the label before applying residue remover, because products suitable for silicone may damage certain plastics or finishes. Wipe the area with a clean cloth and the recommended solvent, then wash away cleaner with mild detergent and water. Dry everything thoroughly.
Effective surface preparation depends on removing grease, soap film, and dust, regardless of the sealant types involved. Inspect the joint before resealing.
Clean and Dry the Sealing Surface
Once you’ve removed the old sealant, scrape away any remaining residue without damaging the bath or sink.
Clean the joint thoroughly to remove soap, grime, and mould, then wipe it with a suitable bathroom cleaner.
Dry the surface completely with a lint-free cloth and allow trapped moisture to evaporate before applying new sealant.
Remove Old Sealant
Before you apply fresh sealant, how well have you removed the old bead? Complete removal gives your new sealant a clean, dependable bond.
Cut along both edges with a sharp utility knife, keeping the blade angled away from the bath, sink, or shower. Pull loose sections steadily; don’t yank, which can leave fragments behind or scratch the surface.
Use a plastic scraper for stubborn residue, then apply a suitable silicone remover according to its instructions. Match your removal techniques to the surface and sealant types involved.
Check every joint carefully, especially corners and behind fittings:
- Remove all visible beads and thin films.
- Scrape gently to avoid chips and scratches.
- Lift residue with plastic tools, not metal.
- Treat cured silicone with approved remover.
- Vacuum or wipe away loosened debris.
Inspect the joint once more before proceeding; leftover material can compromise adhesion.
Dry the Surface
A clean joint won’t bond properly if it’s still damp. After removing old sealant, wash the gap and surrounding surfaces with a suitable bathroom cleaner to eliminate soap scum, grease, mould, and loose debris. Rinse away cleaner residue, then wipe everything with a lint-free cloth.
Effective surface preparation depends on complete drying, so don’t rush this step.
Use a dry cotton bud or folded tissue to absorb water inside narrow joints. Check corners, grout edges, and the underside of bath or sink rims, where moisture often remains hidden.
Improve moisture control by opening a window, running the extractor fan, or using a hairdryer on a low, warm setting. Keep the nozzle moving and avoid overheating plastic or acrylic.
Leave the area until it feels completely dry, not merely touch-dry.
Prepare Baths, Sinks and Showers for Sealing
Prepare the bath, sink, or shower by removing every trace of old sealant, soap residue, mould, and loose debris. Use a plastic scraper and a suitable sealant remover, then wipe away residue with a clean cloth. Don’t scratch glazed surfaces or damage acrylic. Check corners, joints, and behind taps carefully.
Before sealing, confirm the area is completely dry and structurally sound. Improve bathroom ventilation by opening windows or running the extractor fan.
Check these preparation points:
- Remove loose grout and flaking paint.
- Treat mould with an appropriate cleaner.
- Degrease surfaces without leaving a film.
- Protect nearby fittings from scratches.
- Confirm sealant compatibility with each surface.
Allow cleaners to evaporate fully, and let damp materials dry naturally. Don’t seal over hidden moisture, because it can cause poor adhesion, staining, and recurring mould. Work only when surfaces feel clean, dry, and firm.
Apply a Smooth, Watertight Bead
Once the joint is clean and fully dry, cut the sealant nozzle at a 45-degree angle to match the bead width you need.
Choose suitable sealant types: use sanitary silicone for flexible, mould-resistant protection around baths, sinks, and showers.
Load the cartridge into a caulking gun, then pierce the inner seal.
Hold the nozzle against the joint, keeping the angled opening facing forward.
Squeeze the trigger steadily and move the gun at a consistent pace, pushing sealant into the gap rather than dragging over it.
Maintain continuous pressure so the bead remains even and free from breaks.
For wide joints, apply enough material to fill the space without excessive buildup.
Keep water away while the sealant cures, and follow the manufacturer’s application techniques, curing time, and ventilation guidance.
Don’t interrupt the bead at corners.
Tool the Sealant for a Neat Finish
While the sealant is still fresh, smooth the bead with a profiling tool or a clean, damp fingertip to create an even, slightly concave finish. Work in one continuous direction, wiping excess sealant onto a disposable cloth after each pass. Don’t press so hard that you remove material from the joint or expose gaps.
Pay special attention to corners, where you should blend adjoining lines rather than leave ridges. For a professional result:
- Keep your tool clean and slightly damp.
- Use light, consistent pressure.
- Wipe away smears immediately.
- Avoid dragging debris through the bead.
- Check edges for complete contact.
Remove masking tape carefully while the surface remains workable, pulling it away at a sharp angle. Neat edges support sealant longevity and make color matching more convincing, especially with visible white or tinted silicone around fixtures.
Let the New Sealant Cure Properly
After tooling the bead, leave the area undisturbed so the sealant can cure into a flexible, watertight joint. Check the product label for its recommended curing time, because sealant types vary. Silicone usually needs at least 24 hours, while some hybrid or acrylic formulas require different periods.
Keep the bathroom dry during this time: don’t run the shower, splash the sink, or fill the bath. Avoid touching, pressing, or cleaning the bead, since movement can disrupt the curing process and weaken its bond.
Maintain normal ventilation to help moisture escape, but don’t use heat or a fan directly on the joint unless the manufacturer permits it.
Once the stated time has passed, lightly inspect the surface and confirm it feels firm before exposing it to water.
Fix Common Resealing Problems and Mistakes
Even with careful preparation and curing, resealing can produce problems such as gaps, bubbles, smears, poor adhesion, or leaks. For effective resealing troubleshooting, identify the cause before applying more silicone. Remove failed sealant completely, clean away residue, and let surfaces dry. Don’t patch cracks or holes over old material.
- Gaps: Cut out the bead and apply a continuous replacement bead.
- Bubbles: Smooth the sealant immediately with steady, even pressure.
- Smears: Wipe excess with a suitable cleaner before it skins.
- Poor adhesion: Check for dampness, dust, soap, or unsuitable surfaces.
- Leaks: Test only after full curing; persistent leaks may indicate movement or hidden damage.
Avoid common sealing mistakes, including using too little sealant, tooling too late, or disturbing the joint while it cures.
If mould returns quickly, investigate ventilation and underlying moisture.
Frequently Asked Questions
How Often Should Bathroom Sealant Be Replaced?
Replace bathroom sealant every three to five years, or sooner if you notice cracking, peeling, gaps, discoloration, or leaks. Regular inspections improve sealant durability, while prompt replacement supports mold prevention and protects surrounding surfaces.
Can I Reseal Over Existing Mould Stains?
No, you shouldn’t reseal over existing mould stains; they’ll likely return. Remove old sealant, complete thorough mold removal, dry surfaces, then choose suitable sealant types. Stubborn staining may need professional treatment before resealing.
Which Sealant Is Best for Acrylic Baths?
Choose a sanitary-grade, 100% silicone sealant labelled for acrylic compatibility. You’ll get flexible adhesion, waterproof protection, and strong sealant durability. Avoid solvent-based products, which can damage acrylic surfaces or cause cracking over time.
Is Silicone Sealant Safe Around Drinking-Water Sinks?
Yes, silicone sealant’s safe around drinking-water sinks when you choose certified, potable-water-grade products. Check NSF/ANSI 61 approval, follow curing instructions, and don’t use the sink until fully cured to minimize sealant toxicity and protect water safety.
When Should I Call a Professional for Resealing Work?
Call a professional when leaks persist, mold recurs, surfaces remain damp, or joints are damaged. You can use DIY tips for minor gaps, but experts identify structural issues and choose suitable sealing materials safely.
Conclusion
With the right preparation, resealing a bath, sink, or shower is a manageable DIY job. Remove every trace of old sealant, eliminate moisture, and apply a consistent bead of suitable, mildew-resistant silicone. Don’t rush the finishing or curing stages—“measure twice, cut once” applies to careful sealing, too. Keep the area dry for the recommended time, then inspect the joint regularly. If you find persistent dampness or hidden damage, call a qualified professional promptly.


