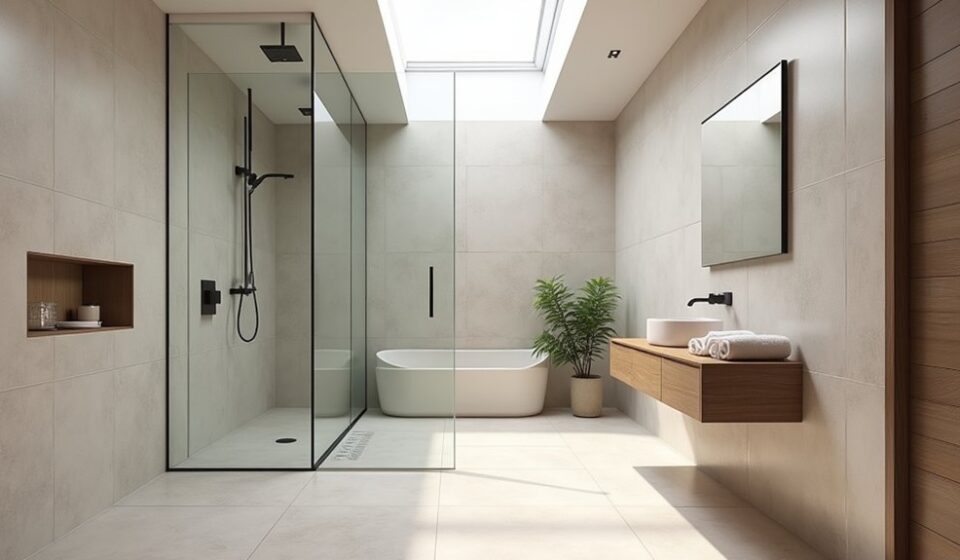

By coincidence, the most stylish wet rooms often prove the most practical, because thoughtful planning makes every detail work harder. You’ll create a smoother layout by combining a walk-in shower, clear glass screen, wall-hung fixtures, and concealed storage. Slip-resistant tiles, reliable waterproofing, and effective drainage protect the room, while layered lighting and easy-clean finishes add comfort. Get these foundations right, and the final design may solve more problems than you expect.
Key Takeaways
- Plan an efficient layout with clear circulation, compact fixtures, concealed storage, and strategically positioned doors.
- Create a spacious walk-in shower with a level entrance, frameless glass screen, thermostatic controls, and slip-resistant flooring.
- Install continuous waterproofing, effective drainage, and removable drain components to protect the structure and simplify maintenance.
- Choose durable, slip-resistant tiles, mold-resistant grout, and coordinated matte or satin finishes for safety and style.
- Layer wet-zone lighting, ensure good ventilation, and establish regular cleaning routines to prevent moisture, buildup, and deterioration.
Plan a Wet Room Layout That Flows

Start by mapping how you’ll move through the room, placing the shower, toilet, and vanity so each zone feels accessible without interrupting another. Keep clear circulation paths, and position the door to preserve usable wall space for storage or towel hooks.
A wall-hung toilet and compact vanity can make a narrow room feel more open, while a consistent floor level supports easy movement throughout the space.
Plan drainage early, allowing enough fall toward the drain without creating awkward *progressions*. Consider sightlines from the doorway, using the vanity as a visual anchor and keeping functional elements neatly aligned.
Your color schemes should reinforce spaciousness, with light tones or controlled contrast defining each zone. Coordinate material choices for durability, slip resistance, and a cohesive finish that makes the layout feel intentional.
Choose a Walk-In Shower and Screen
Choose a shower size that gives you comfortable movement without overwhelming the room.
Select clear, durable glass screening to maintain an open feel, and plan a wide, level entrance for easy access.
Select Shower Size
A walk-in shower can make a wet room feel open and streamlined, but its size should suit both the room and your daily routine. Measure the available floor area, allowing comfortable clearance around the toilet, basin, and door.
A compact shower may work in a small ensuite, while a wider footprint gives you room to turn, dress, and share the space without splashing beyond the wet zone. Check the shower head’s projection and water pressure, since strong flow may require extra depth to contain spray.
Consider your height, mobility, and whether you’ll use a bench or handheld fitting. Keep the layout generous enough for practical movement, but avoid oversizing it, which can make heating harder and reduce valuable floor space.
Plan drainage early, too, so the shower floor falls correctly toward the waste.
Choose Glass Screening
Glass screening keeps a walk-in shower feeling open while directing spray away from the rest of the room. Choose a panel that suits your shower’s width, ceiling height, and splash pattern, then position it to protect nearby fixtures without closing in the design. Consider these options:
- Frameless screens: Minimal hardware creates a clean, contemporary look and lets light travel through the room. Use thicker safety glass and precise fittings for stability.
- Frosted glass: Select a translucent finish when you want privacy while retaining a bright, spacious atmosphere. Subtle textures can add visual interest without overwhelming the scheme.
- Clear glass: Maximise openness and showcase statement tiles, but plan regular cleaning to control water marks.
Match the screen’s hardware to your taps and accessories. A low-profile channel or discreet clamps will keep the finish polished and cohesive.
Plan Easy Access
Once your screen placement is settled, plan the shower entrance around effortless movement. Choose a walk-in design with a level, flush threshold so you won’t need to step over a raised tray. Allow generous clearance for turning, drying, and assisting another person, while positioning the opening away from direct spray.
A fixed glass panel can contain water without creating a visual barrier; add a hinged section only when your layout needs extra protection.
Build accessibility features into the room from the beginning. Fit a thermostatic shower for dependable temperature control, a handheld riser for flexible use, and a sturdy seat or fold-down perch if required.
Your safety considerations should include slip-resistant flooring, discreet grab rails, strong lighting, and outward-opening doors where applicable. Keep controls reachable from outside the spray zone, too.
Get Wet Room Drainage and Waterproofing Right
Getting drainage and waterproofing right is the foundation of a successful wet room, because even the most stylish finishes won’t compensate for standing water or hidden leaks. Start by planning these essentials:
- Choose drainage options that suit your room’s layout, including a linear drain at the shower edge or a discreet central outlet. Confirm the floor can achieve the required fall without awkward connections.
- Install a continuous waterproof membrane across the floor, walls, corners, and around every pipe penetration. Use a compatible sealing system rather than relying on grout or surface coatings.
- Have a qualified installer test the system before closing walls or adding fittings. Check that water flows freely, the waste pipe has adequate capacity, and the membrane remains undamaged during installation.
Good preparation protects your structure, simplifies cleaning, and lets your design look polished for years.
Use Tiles to Add Style and Safety
Choose wet-room tiles for more than their colour or pattern: you’ll need a slip-resistant surface underfoot, low water absorption, and a finish that’s easy to clean. Porcelain generally performs well, while textured or matt finishes provide useful grip without looking overly utilitarian.
Check the tile’s slip rating, especially for the shower zone, and choose smaller formats or mosaics where you need extra fall around the drain. Use larger tiles on walls to create a calmer, more spacious impression, but confirm your installer can achieve neat, waterproof joints.
Plan tile patterns carefully so lines support the room’s proportions rather than making the space feel busy. Coordinate colour schemes with your fittings and lighting: soft neutrals reflect light, while a contrasting feature wall adds depth.
Keep grout durable, mould-resistant, and easy to maintain.
Build In Smart Wet Room Storage
Build storage into the wet room so toiletries stay accessible without cluttering the floor or interrupting the clean lines of the design. Plan smart storage during construction, when you can recess niches between studs or create a discreet ledge beside the shower.
- Recessed niches: Line them with waterproof panels or matching tile, and size each shelf for bottles, soaps, and everyday essentials.
- Floating vanity: Choose a wall-mounted unit with drawers to keep towels and cleaning supplies hidden while making the room feel more spacious.
- Tall cabinetry: Use a slim, moisture-resistant cupboard for spare linens without consuming valuable floor area.
For effective space optimization, measure your products before fixing shelf heights. Add a gentle slope to horizontal surfaces so water drains away, and select sealed finishes that resist humidity, stains, and frequent cleaning.
Keep storage within easy reach, but outside the main spray zone.
Layer Lighting for Comfort and Function

Layered lighting makes a wet room feel safer, more comfortable, and more refined. Start with a soft ambient glow from dimmable ceiling fixtures or recessed waterproof downlights. Choose fittings rated for bathroom use, and position them to distribute light evenly without harsh shadows.
Add task illumination where you need precision, such as beside the mirror, above the vanity, or near a shower control. Vertical sconces or backlit mirrors can flatter your reflection while reducing glare. Use warm-to-neutral white bulbs to create a welcoming atmosphere, but keep color rendering high so surfaces and skin tones look natural.
Accent lighting can highlight architectural details, niches, or a freestanding tub. Install separate switches or smart controls, so you can brighten the room for morning routines and soften it for evening relaxation. Keep every fitting safely rated for wet zones.
Finish Your Wet Room for Easy Maintenance
When you’re selecting finishes for a wet room, prioritize smooth, durable surfaces that resist water, stains, and soap buildup. Choose large-format porcelain tiles to reduce grout lines, then seal grout and natural stone according to the manufacturer’s guidance. A frameless glass screen keeps the room visually open, while a wall-hung toilet simplifies mopping beneath it.
- Select satin or matte fixtures that disguise water spots without creating a textured surface that traps residue.
- Install a linear drain with a removable grate, making hair and debris easy to clear.
- Add a squeegee, concealed storage, and moisture-resistant paint to support efficient cleaning routines.
Wipe glass and fittings after showers, ventilate the room, and inspect silicone joints regularly. Build these tasks into a realistic maintenance schedule, replacing worn sealant promptly to prevent hidden water damage.
Consistent care preserves your wet room’s polished appearance and performance.
Frequently Asked Questions
Can I Install a Wet Room in an Upstairs Bathroom?
Yes, you can install a wet room in an upstairs bathroom, but you’ll need robust water proofing, properly sloped flooring, strengthened joists if necessary, reliable drainage, and professional installation to prevent leaks and structural damage.
Do Wet Rooms Increase a Property’s Resale Value?
Wet rooms can increase resale value, though results vary; buyers often value luxury features and space optimization. You’ll strengthen appeal with quality waterproofing, elegant finishes, and accessible design, but don’t expect full installation costs recovered.
How Much Does a Typical Wet Room Installation Cost?
You’ll typically spend £6,000–£12,000 installing a wet room, depending on size, finishes, and structural work. Budget for professional Waterproofing techniques, Ventilation requirements, drainage, labour, tiles, fixtures, and contingency to achieve a stylish, durable result.
What Heating Options Work Best in a Wet Room?
Choose Underfloor heating for evenly distributed warmth, choose towel radiators for drying towels, and choose both for maximum comfort. You’ll appreciate programmable electric mats, while wall-mounted, thermostatic radiators preserve space and complement your wet room’s design.
Do I Need Planning Permission to Create a Wet Room?
You typically don’t need planning permission to create a wet room, unless you alter the building’s structure, drainage, or use. Check local regulations, and meet building-control requirements for waterproof flooring, wet room ventilation, and accessibility.
Conclusion
Create a wet room that works beautifully by balancing smart planning with stylish details. Prioritize a practical layout, protective waterproofing, precise drainage, and slip-resistant surfaces from the start. Then add spacious glass, built-in storage, layered lighting, and sleek finishes to shape a calm, clutter-free retreat. Choose durable materials you’ll enjoy maintaining, and don’t neglect regular cleaning or silicone checks. With thoughtful choices and consistent care, you’ll have a safe, sophisticated space that serves you well.