Small plaster cracks often look worse than they are, and you can usually repair them without replastering the wall. First, check whether the crack is stable and superficial rather than widening or linked to structural movement. Then gather a putty knife, flexible filler, fine sandpaper, primer, and matching paint. Proper preparation makes the repair last, so don’t rush past cleaning and widening the crack slightly before filling it.
Key Takeaways
- Inspect the crack for widening, dampness, loose plaster, diagonal patterns, or recurring movement before attempting a cosmetic repair.
- Clean the area, remove loose material, and widen the crack slightly into a shallow V-shaped groove.
- Press patching plaster or premixed filler into the groove, applying several thin layers for deeper cracks and allowing each to dry.
- Scrape, feather, and lightly sand the dried filler until smooth, then remove all dust before priming.
- Apply matching primer and paint, while monitoring repaired cracks and addressing moisture or structural problems promptly.
Check Whether the Crack Needs Plaster Repair

Before repairing a plaster wall crack, determine whether it’s merely cosmetic or a sign of a larger problem. Examine its width, direction, and location. Hairline cracks that follow the wall’s surface, especially around old paint or seams, usually need only minor patching.
Cracks wider than 1/8 inch, those that grow, or those running diagonally from corners may indicate movement, settling, or moisture. Don’t conceal recurring damage until you identify its cause.
Press gently beside the crack. If the plaster feels loose, hollow, damp, or crumbly, you’ll need to address weakened material before applying a finish. Check for stains, peeling paint, or changes in wall texture, which can signal leaks or persistent humidity.
Compare the surrounding paint color with nearby areas to spot fading or water damage. If doors stick, floors slope, or multiple cracks appear, consult a qualified professional before proceeding.
Gather Tools for Plaster Crack Repair
Gather a putty knife, utility knife, sanding block, and clean cloth before you begin.
Choose suitable patching plaster or compound, mesh tape, and primer for a durable repair.
Wear safety glasses, a dust mask, and gloves to protect yourself while cutting, sanding, and applying materials.
Essential Repair Tools
For a clean, durable plaster-crack repair, you’ll need a utility knife, a small putty knife, fine-grit sandpaper, a vacuum or brush, a damp sponge, mesh tape or joint compound, and matching primer and paint. Keep a flashlight nearby so you can inspect the crack’s depth and edges clearly.
Use the utility knife to open loose, crumbly plaster into a shallow V, then rely on the putty knife for controlled application and smoothing. A vacuum or brush removes dust, while the damp sponge cleans residue without soaking the wall.
Choose sandpaper fine enough to prevent gouges during feathering. Before you start, note possible plaster crack causes, such as settling or moisture, and consider your repair timeline.
Wear safety glasses and a dust mask, and protect floors with a drop cloth.
Recommended Patching Materials
Choose patching materials that match the crack’s size and the plaster’s condition. For hairline cracks, use lightweight spackling or a fine crack filler that sands smoothly and shrinks minimally.
Choose a setting-type joint compound for slightly wider cracks; it hardens quickly and resists recurring movement better than premixed filler.
For loose, crumbly, or deeper areas, select a compatible plaster patching compound rather than ordinary wall filler.
Keep fiberglass mesh tape available for cracks that reopen or extend across joints, since it reinforces the repair beneath the compound.
Use a small tub of premixed compound for convenience, or mix powdered compound when you need a firmer, longer-lasting patch.
Match the material’s texture to the surrounding wall, and check the label for plaster compatibility before application.
Safety Gear Checklist
Before you start repairing plaster, protect yourself and prepare the right tools. Wear Personal protective equipment: safety glasses to shield your eyes from falling dust, a well-fitting dust mask or respirator for fine particles, and work gloves to protect your hands from sharp edges and compounds. Choose long sleeves and sturdy shoes, especially when working overhead.
Gather a utility knife, putty knife, sanding sponge, small brush, mixing container, patching compound, and a damp cloth. Use a stable step stool rather than a chair, and keep your work area well lit. Cover floors and furniture with a drop cloth, and open windows for ventilation.
Inspect every tool before use; tool maintenance prevents slips, breaks, and uneven repairs. Keep blades capped, cords out of walkways, and children and pets away.
Prepare the Crack for Filling
Start by widening the crack slightly with a utility knife or the edge of a putty knife, cutting a shallow V-shaped groove along its length. This opening gives the repair material a stable edge to grip.
During your crack size assessment, check whether the damage is only a hairline surface crack or extends deeper into the plaster. If the wall feels loose, crumbles significantly, or the crack keeps widening, stop and investigate the underlying movement before continuing.
Use suitable surface preparation techniques to remove loose plaster, dust, and flaking paint from the groove. Brush the area with a stiff, dry brush, then wipe it with a slightly damp cloth. Let the surface dry completely.
Protect nearby flooring, and avoid soaking the plaster, since excess moisture can weaken it and interfere with adhesion. Keep the groove clean and sharply defined.
Apply Filler to the Plaster Crack
Once the V-shaped groove is clean and completely dry, press a thin layer of premixed plaster filler or patching compound into the crack with a putty knife. Work across the groove first, forcing compound into its full depth rather than merely coating the surface. Then add enough filler to slightly overfill the channel, accounting for minor shrinkage as it cures.
Keep the application narrow and controlled, and don’t dilute premixed product unless the label specifically allows it. For deeper cracks, apply the compound in two or more thin lifts, allowing each layer to cure before adding another.
Check the manufacturer’s filler drying time, since humidity, temperature, and depth affect curing. If crack expansion is likely, use a flexible, paintable filler designed for movement instead of a rigid compound.
Avoid disturbing the repair while it sets.
Smooth and Blend the Repaired Area
After the filler has cured fully, hold a clean putty knife nearly flat against the wall and scrape away the excess, working from the center of the repair outward. Keep the blade angled slightly at the edges so you don’t gouge the surrounding plaster. Make several light passes rather than forcing one heavy stroke.
Feather the filler across the crack until the changeover feels gradual and looks level under angled light. For Texture matching, press a barely damp sponge, stippling brush, or similar tool lightly over the repair while the filler remains workable. Choose the method that matches the existing wall pattern.
Use consistent Blending techniques, softening obvious edges without disturbing nearby plaster. Wipe the knife clean between passes, and let the surface cure completely before proceeding to the next preparation step.
Sand the Wall Before Painting
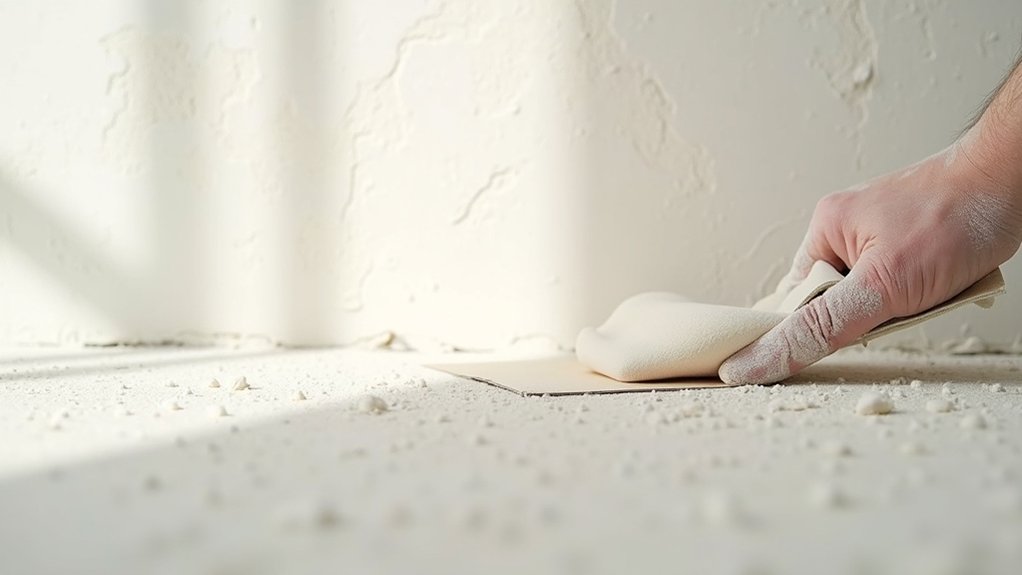
When the filler is fully cured, sand the repaired area with fine-grit sandpaper until it feels flush with the surrounding plaster. Use light, even strokes to avoid gouging the surface or widening the crack. Feather the edges several inches beyond the repair so no ridge remains beneath the finish.
- Hold the paper flat for consistent contact.
- Match the existing wall texture with gentle, controlled sanding.
- Wipe away dust with a clean, dry cloth.
- Inspect the area under angled light.
- Repeat lightly if you can still feel a lip.
Wear a dust mask and protect nearby furniture while sanding. Don’t use coarse paper, which can leave scratches that show through later.
Check the surface for loose particles, chalky residue, or uneven filler. A clean, uniformly smooth repair supports paint compatibility and helps the finished wall look seamless. Avoid applying paint until the surface is dust-free.
Prime and Paint the Repaired Plaster
Once the repaired plaster is smooth and dust-free, apply a suitable primer to seal the surface and guarantee even paint absorption.
Let the primer dry fully, then paint the repaired area with matching color and finish.
Feather the paint slightly beyond the repair so the touch-up blends seamlessly.
Apply a Suitable Primer
With the repaired plaster fully dry and smooth, seal the area with a suitable plaster or drywall primer before painting. This step evens out porosity, locks down fine dust, and improves surface adhesion. Use this primer technique:
- Remove sanding dust with a clean, dry brush or vacuum.
- Choose a water-based drywall primer for ordinary interior plaster.
- Use a stain-blocking primer if water marks, smoke, or discoloration remain.
- Stir the primer thoroughly, but don’t whip in air.
- Apply a thin, even coat with a quality brush or short-nap roller.
Extend the primer slightly beyond the repair to prevent a visible boundary. Don’t flood the crack or repeatedly brush drying primer, because you may soften the filler or leave ridges.
Let the coat dry according to the manufacturer’s instructions, then inspect it under strong side lighting. If the surface still looks uneven or powdery, apply a second light coat. You’re then ready for the separate painting stage.
Paint the Repaired Area
After the primer has dried and the repaired plaster looks smooth under side lighting, paint the area with the matching wall finish. Stir the paint thoroughly, then apply a thin coat with a small roller or quality brush, extending slightly beyond the repair. Keep your pressure light and feather the edges so you don’t create a visible ridge.
Let the first coat dry completely, following the manufacturer’s instructions, before deciding whether you need a second coat.
For accurate Color matching, use leftover paint from the original job or have a store scan a sample from an inconspicuous spot. Match the existing paint finish—flat, eggshell, satin, or gloss—because sheen differences can reveal even a well-filled crack.
Remove painter’s tape while the final coat remains slightly soft, then inspect the wall in normal daylight.
Prevent Small Plaster Cracks From Returning

To keep small plaster cracks from returning, address the underlying cause rather than simply covering the damage. Start with a careful Crack size assessment; widening, recurring, or branching cracks may indicate movement that requires professional inspection.
For stable surface cracks, strengthen the repair and control conditions that stress plaster:
- Keep indoor humidity between 30% and 50%.
- Improve ventilation in kitchens, bathrooms, and laundry areas.
- Repair roof, plumbing, or window leaks promptly.
- Maintain steady temperatures to limit expansion and contraction.
- Avoid attaching heavy fixtures directly to fragile plaster.
Before repainting, confirm the wall feels dry and firm. Use flexible, paintable caulk where plaster meets trim or other materials, since these joints move slightly.
Don’t sand aggressively, which can weaken surrounding plaster. Moisture prevention remains essential: use exhaust fans, address condensation, and watch repaired areas for staining, softness, or renewed cracking.
Frequently Asked Questions
Can I Repair Plaster Cracks if the Wall Has Wallpaper?
Yes, you can repair plaster cracks beneath wallpaper, but you’ll need Wallpaper removal first. Complete Surface preparation, fill and sand the crack, then prime thoroughly before installing new wallpaper for a smooth, lasting finish.
How Long Should I Wait Before Hanging Pictures on the Repaired Area?
Wait at least 48 hours before hanging pictures, ensuring the repair feels completely hard and dry. Check the filler’s Drying time, then confirm the Paint match and avoid heavy frames until curing finishes.
Are Plaster Crack Repairs Safe in Homes With Children or Pets?
Yes, you can make plaster crack repairs safe for children and pets. Child safety comes first: remove dust, secure loose debris, and keep everyone away until compounds dry. Pet safety improves with ventilation and cleanup.
When Should I Call a Professional Instead of Repairing the Crack Myself?
Call a professional when cracks widen, recur, spread diagonally, surround doors, or accompany bulging, dampness, or movement. Prioritize DIY safety and tool selection; stop if you suspect structural damage, asbestos, or unsafe electrical wiring.
Can Recurring Cracks Indicate Foundation or Structural Problems?
Yes, recurring cracks can signal foundation issues or threaten structural integrity. You shouldn’t ignore widening, stair-step, diagonal, or accompanied cracks. Track changes, inspect nearby doors and floors, and call a qualified structural professional promptly for evaluation.
Conclusion
Repairing small plaster cracks doesn’t have to feel like climbing a mountain. Check that the damage is cosmetic, clean and widen the crack, then press in flexible filler and smooth it carefully. After drying, sand the patch, apply primer, and paint to match the wall. Keep humidity steady and address movement or recurring cracks promptly. With the right preparation and materials, you’ll restore a clean, durable finish without replastering the entire surface.