How to Rip Out an Old Bathroom and Convert It Into a Fully Waterproofed Wet Room

Converting an old bathroom into a fully waterproofed wet room takes more than removing tiles and fitting a drain. You’ll need to plan the layout, isolate water and electricity, check for asbestos, and follow local building and electrical regulations. Careful preparation can prevent costly leaks and structural repairs later. Start by evaluating the room, setting a realistic budget, and identifying which work requires a qualified professional before you begin the strip-out.
Key Takeaways
- Plan the layout around drainage, floor falls, waterproofing, ventilation, access, and local building regulations before demolition.
- Isolate water and electricity, wear protective equipment, remove fittings carefully, cap pipes, and control dust during strip-out.
- Check exposed floors, framing, plumbing, and suspected asbestos materials; document damage and use qualified professionals where necessary.
- Install correctly sized drainage, form proper falls, and apply a compatible tanking system with sealed joints, corners, and penetrations.
- Fit wet-room fixtures, slip-resistant tiles, waterproof-rated electrics, and reinforced grab-rail fixings, then test drainage and all connections thoroughly.
Plan the Wet Room Before You Rip Out

Before you remove anything, plan the wet room around drainage, falls, waterproofing, ventilation, and access to services. Check local building regulations and confirm whether you need approval, especially if you’re altering structural floors, electrics, or plumbing.
Measure the room accurately, locate existing waste pipes, and ask a qualified plumber to verify that the drain can handle the proposed flow.
Design layout with the shower zone positioned to achieve the required gradient without excessive floor buildup. Allow clear access, safe door swings, and suitable ventilation to control condensation.
Select fixtures that suit the room’s dimensions, water pressure, and budget; wall-hung options may simplify cleaning but can cost more.
Specify a compatible tanking system, falls, former, and drain from one manufacturer where possible.
Price materials, labour, certification, and contingencies before work starts.
Remove the Old Bathroom Safely
Once the plan and services are confirmed, shut off the water and electricity to the room, then verify that each supply is isolated before dismantling anything. Wear gloves, eye protection, sturdy footwear, and a suitable mask. Keep children and pets away, and check local rules for electrical work, waste disposal, asbestos, and structural changes.
- Remove mirrors, cabinets, fittings, and sanitaryware carefully; cap exposed pipes to prevent leaks.
- Lift tiles methodically, controlling dust and protecting adjacent rooms with plastic sheeting.
- Separate reusable items, recyclable metal, and rubble to reduce disposal charges.
- Photograph connections and label pipework before removing components, helping future Plumbing upgrades and avoiding costly mistakes.
Don’t disturb suspected asbestos-containing boards, adhesive, or insulation. Stop and arrange professional testing and removal.
Store salvageable materials safely, but don’t compromise safety for resale value. Record hidden damage, and inspect subfloors and framing before proceeding.
A clean, documented strip-out supports future Tile maintenance.
Install Drainage and Waterproof the Wet Room
With the room stripped back, install the drainage system to the approved layout and local regulations, ensuring the floor falls consistently toward the waste outlet. Check pipe sizes, trap access, gradients, and connection points before closing anything up. Have a qualified plumber inspect alterations where required, because correcting hidden drainage later costs far more.
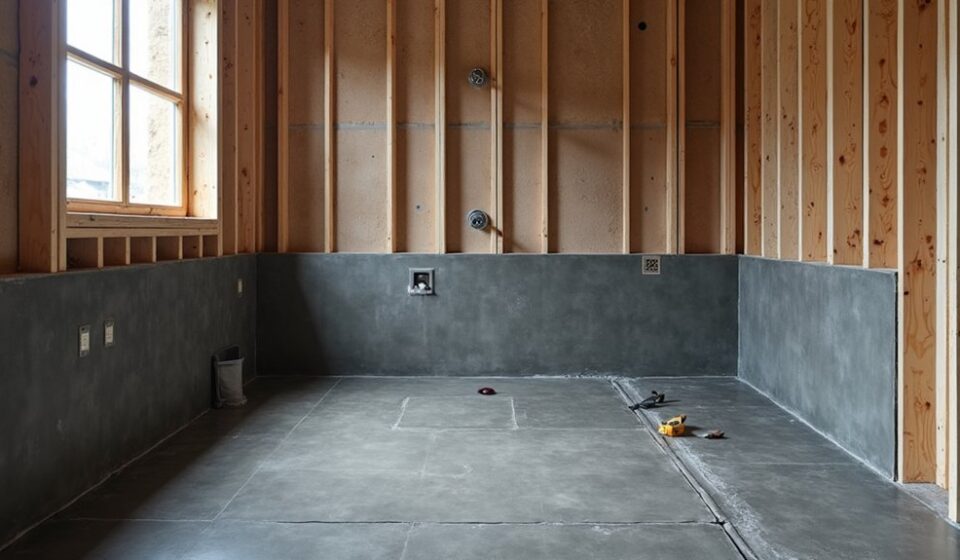
Form the floor falls with a suitable screed or proprietary former, then allow it to cure fully. Apply a compatible tanking system across the floor, upstands, corners, penetrations, and lower walls. Reinforce joints with the manufacturer’s tape and seal around the drain using its approved collar. Follow drying times and don’t substitute products casually.
Plan Tile selection around slip resistance, moisture tolerance, and the floor’s gradient. Coordinate lighting design with waterproof-rated fittings and electrical regulations, keeping connections outside wet zones. Photograph concealed work for future reference.
Fit the Wet Room Suite and Finish the Space
After the tanking system has cured and passed inspection, fit the tray, drain cover, toilet, basin, shower controls, and screen according to the manufacturers’ instructions. Protect seals, maintain service access, and follow required clearances and electrical zones.
- Choose slip-resistant, low-porosity tiles; sensible Tile selection reduces cleaning and replacement costs.
- Use compatible adhesive and grout, then seal junctions without blocking drainage paths.
- Plan Lighting design with IP-rated fittings suitable for wet zones, and have electrical work certified by a qualified installer.
- Fit grab rails or reinforcement now, even if you don’t need them yet.
Check every waste connection for leaks, test the shower’s flow, and confirm the floor drains freely.
Install trim, mirrors, ventilation controls, and accessories without puncturing waterproofed areas.
Keep certificates, product instructions, and inspection records for future maintenance and compliance.
Let grout cure before regular use.
Frequently Asked Questions
Can I Convert Any Bathroom Into a Wet Room?
You can convert most bathrooms into wet rooms, but you’ll need suitable floor structure, drainage gradients, waterproofing, and ventilation. Check Bathroom design and Plumbing installation requirements, obtain approvals, and budget for structural changes, professional work, and compliance.
Do I Need Planning Permission for a Wet Room Conversion?
Usually, you won’t need planning permission for an internal wet-room conversion, but you must meet Building regulations. Around 20% of projects uncover hidden defects, so budget for a structural assessment and confirm requirements locally first.
How Long Does a Complete Wet Room Conversion Typically Take?
You’ll typically need two to four weeks for a complete wet room conversion, including demolition, plumbing, waterproofing, Tile selection, ventilation requirements, tiling, and curing. Complex layouts, inspections, or hidden damage can extend the schedule.
What Maintenance Does a Fully Waterproofed Wet Room Require?
You’ll need routine cleaning, sealant maintenance, and drain inspection. Check grout, seals, falls, and waterproofing penetrations regularly; clear blockages promptly, repair damage, and follow manufacturer guidance to protect compliance and avoid costly water damage.
How Much Does Converting a Bathroom Into a Wet Room Usually Cost?
You’ll usually spend $8,000–$20,000 converting a bathroom into a wet room, depending on size and location. Budget for waterproofing, drainage, Tile selection, Plumbing upgrades, labor, permits, and required accessibility or building-code compliance.
Conclusion
By planning carefully, removing safely, installing correct falls, and sealing every surface, you can turn an outdated bathroom into a reliable wet room. Check regulations, isolate services, test drainage, and use certified waterproofing products before you tile. Don’t cut costs on tanking, electrical protection, or slip-resistant finishes; save instead through careful preparation and sensible fixture choices. When you inspect, test, and seal each stage, you’ll create a safer, more durable space that’s built to last.